Learn how to draw a great looking Plant Life Cycle with easy drawing instructions and video tutorial.
By following the simple steps, you too can easily draw a perfect Plant Life Cycle.
Step-by-Step Instructions for Drawing a Plant Life Cycle
How to Draw a Great Looking Plant Life Cycle for Kids and Beginners - Step 1

1. Begin the plant life cycle drawing by sketching three teardrop shapes. These are the seeds. On the side of the page, draw another teardrop, this time with a line down the center.
Extend pairs of lines from this line, erasing as necessary; allow two to meet at a point and the others to create a "Y" shape. These are the roots and stem sprouting from a seed.
Drawing Step 2

2. Draw a leaf at the top of the stem. Use a curved line for the central vein. Below this baby plant, draw a series of curved lines that branch into "Y" shapes.
These are the roots of the growing young plant.
Unlock AD FREE and PRINTABLE drawing and coloring tutorials
- 1,900+ drawing & coloring PDFs
- 50+ ebooks
- Ad-free website
Drawing Step 3
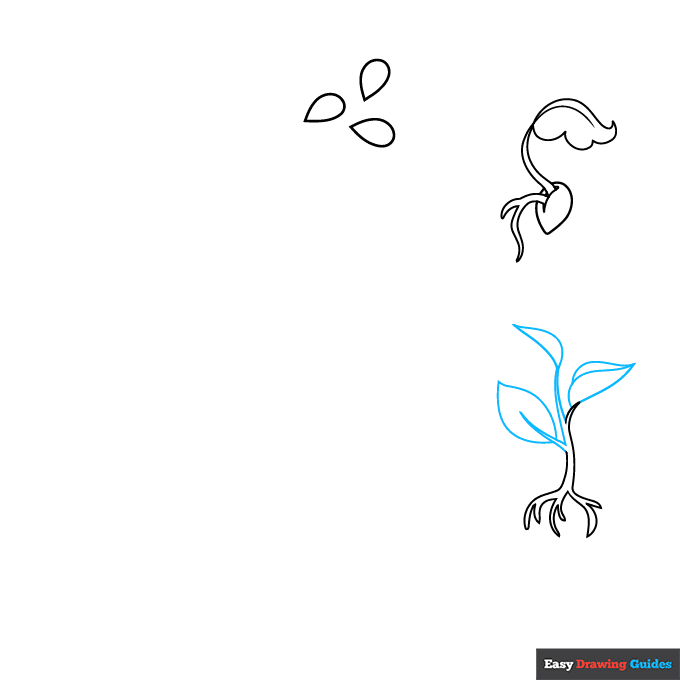
3. Extend pairs of lines from the stem. Around them, enclose pointed leaf shapes.
Drawing Step 4
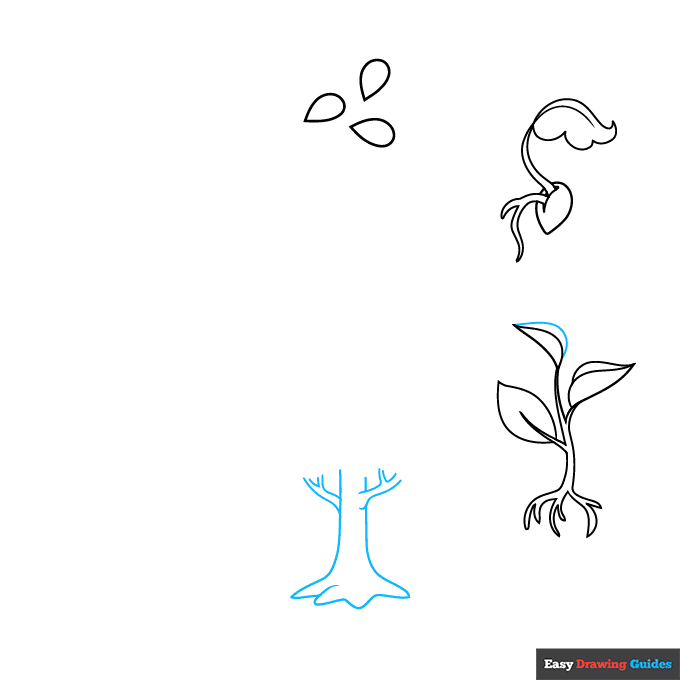
4. Complete the leaves, then begin a full-grown tree at the bottom of the page. Use curved lines that meet at gentle points at the bottom and branch into "Y" shapes at the top.
Drawing Step 5
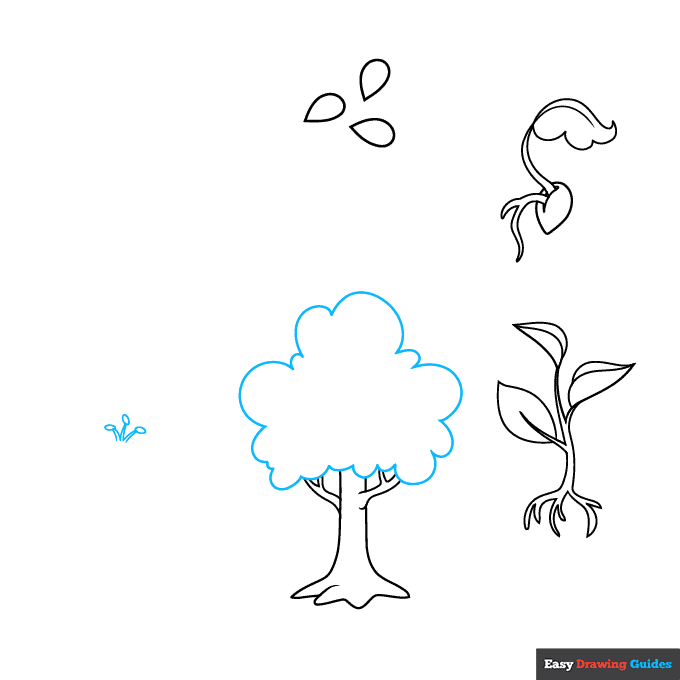
5. Use a series of curved lines to draw the cloudlike crown of the tree atop the trunk. Beside it, draw three pairs of lines, each with an oval at the end. This is the center of a flower.
Drawing Step 6

6. Draw two more pairs of lines and ovals surrounded by a series of "U" shaped lines at the bottom. Use overlapping curved lines to begin the round petals.
Drawing Step 7
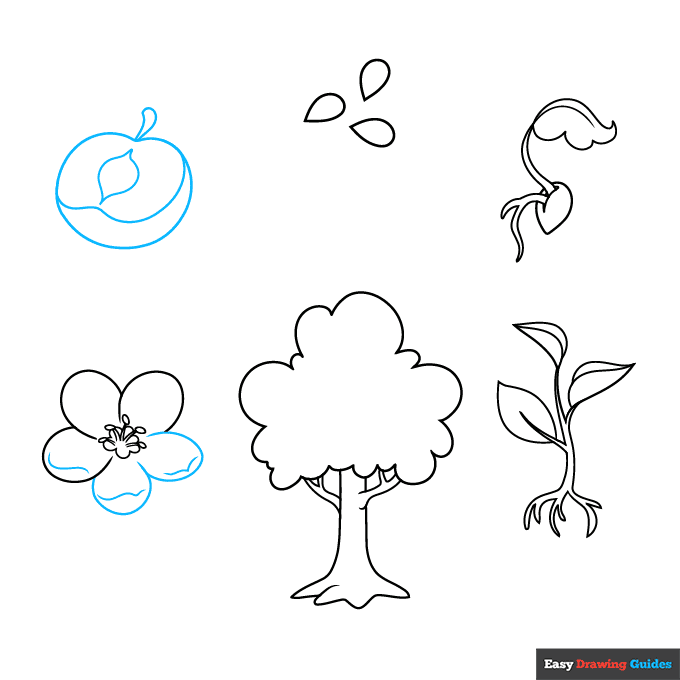
7. Draw two more round petals to complete the flower outline. Contour some of the petal edges with curved lines. Above the flower, draw an apple that has been cut in half.
Use curved lines to draw the double-pointed core, the flesh around it, and the round outside of the apple. Extend a line and double it back on itself to form the stem.
Add More Details to Your Plant Life Cycle Picture - Step 8
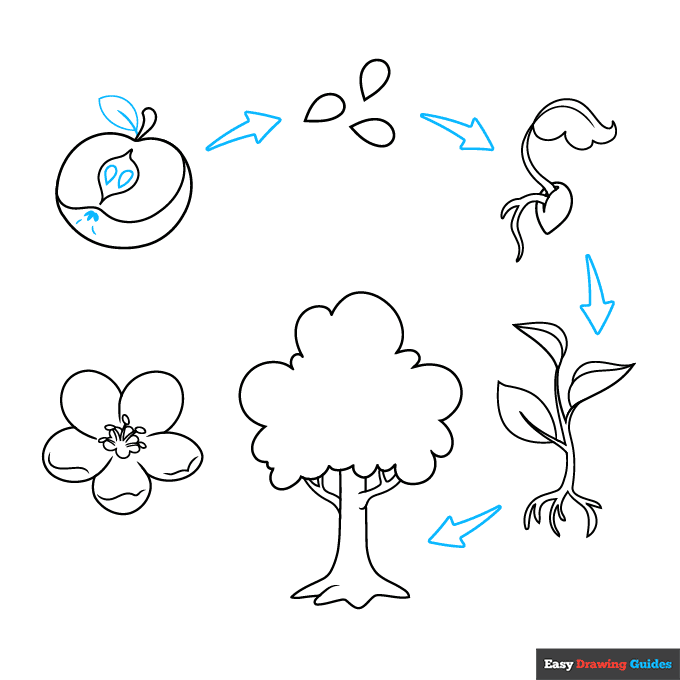
8. Draw two teardrop-shaped seeds inside the apple and a leaf on the stem. Detail the bottom of the apple with short lines. Begin drawing arrows between the drawings, pointing clockwise.
Complete the Outline of Your Plant Life Cycle Drawing - Step 9
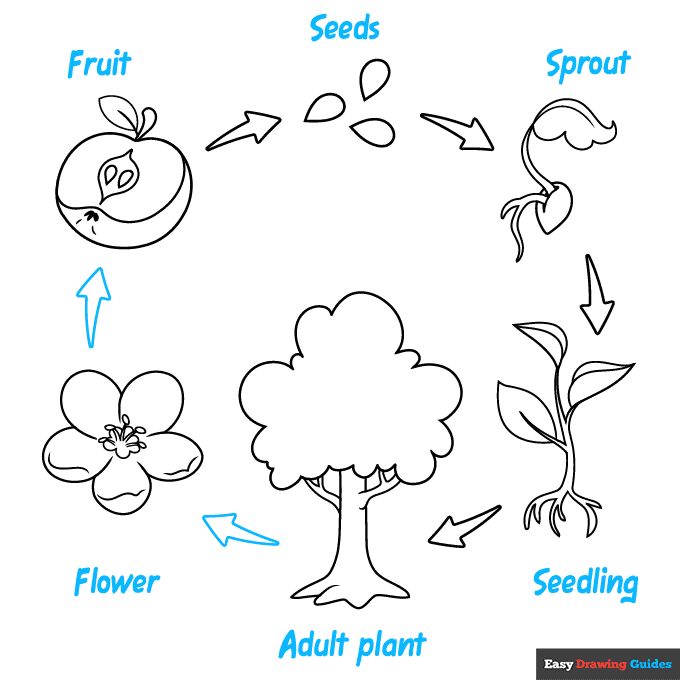
9. Finish drawing the arrows and label the Seeds, Sproit, Seedling, Adult plant, Flower, and Fruit.
Color Your Plant Life Cycle Drawing
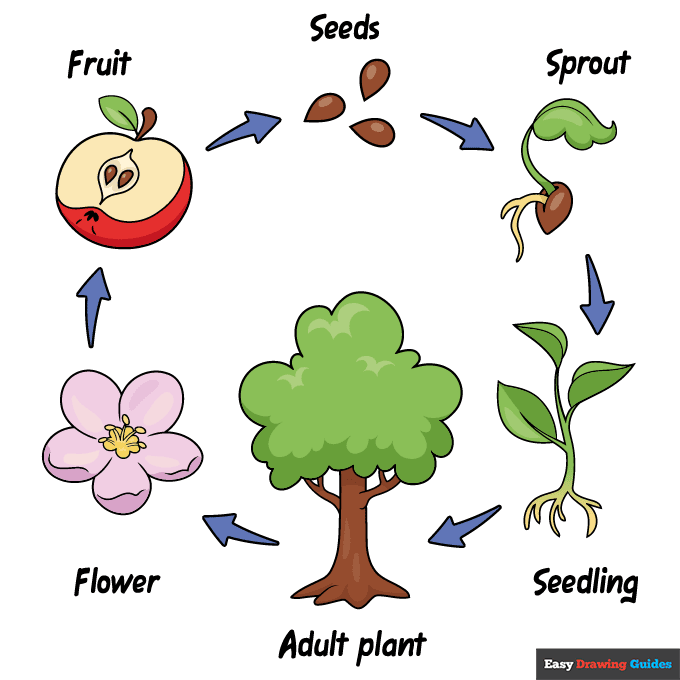
Your plant life cycle outline is now complete. Color your drawing.
Watch 'How to Draw a Plant Life Cycle' Video Tutorial
Learn More About The Plant Life Cycle Drawing
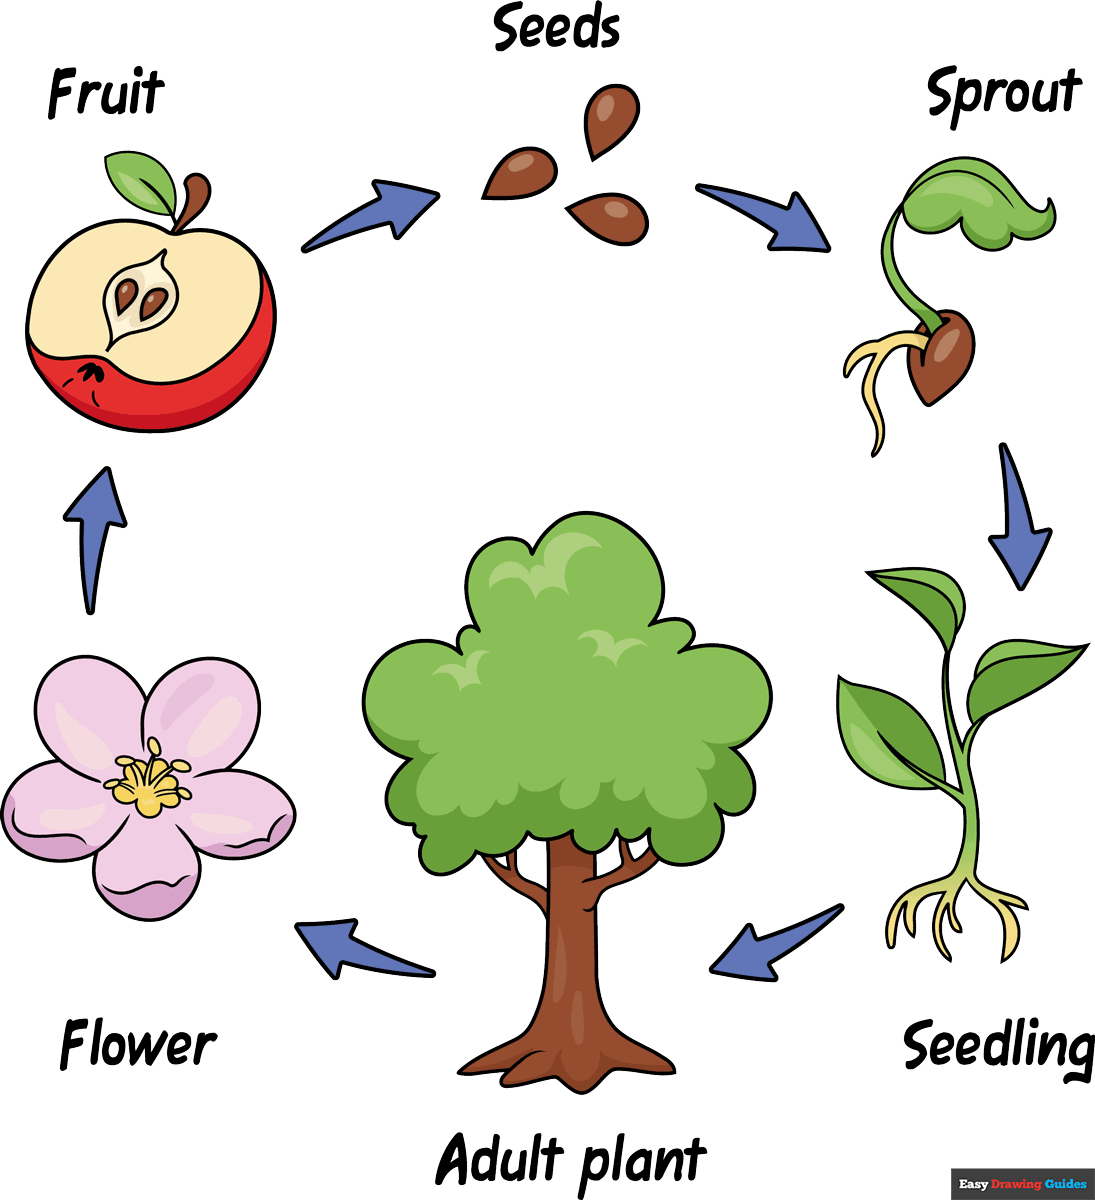
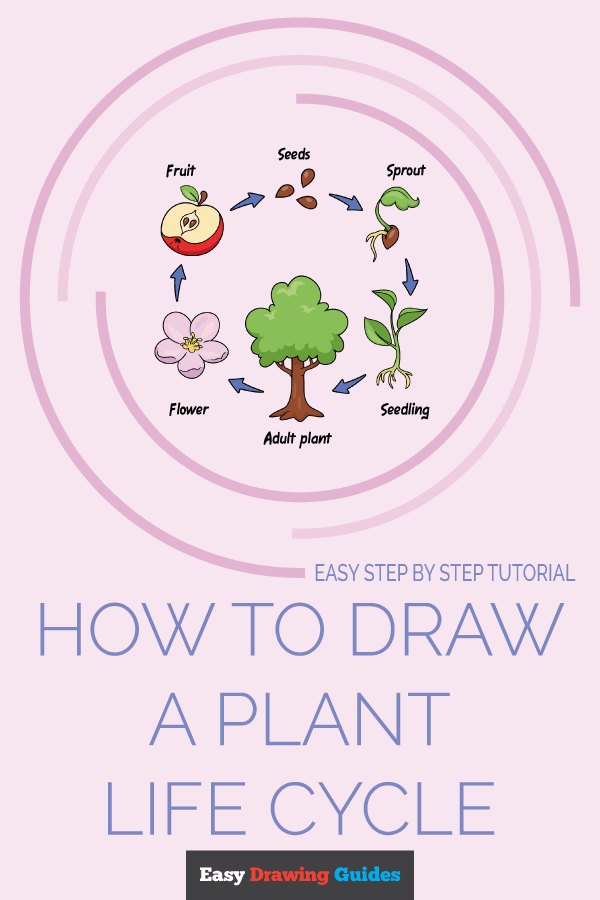
Do you know how a tiny seed becomes a massive tree? You can find out this and more when you sketch this plant life cycle drawing.
Plants can't run around like animals do, but they are still amazing. Many start as tiny seeds, sometimes as small as grains of sand.
This diagram follows an apple seed through its life cycle. You'll see it sprout and grow into a mighty tree, flower, and produce fruit - fruit that has more seeds inside! Thus, the cycle begins again.
This drawing is great for a science fair project. You can learn even more about plants. For example, this plant diagram drawing names all the parts.
This food chain drawing shows how plants fit into the ecosystem.
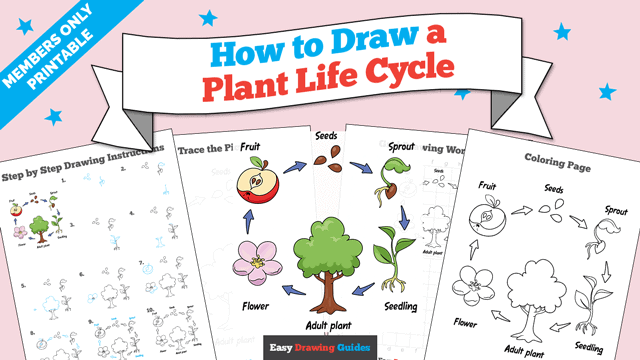
Plant Life Cycle Drawing Tutorial - Easy & Fun Printable Pages
Join now and get immediate access to thousands of printable drawing instruction and practice pages!
Learn how to get access to thousands of printable pages!

MEMBER TROUBLESHOOTING
Still seeing ads or not being able to download the PDF?
First, check that you're logged in. You can log in on the member login page.
If you're still not able to download the PDF, the likely solution is to reload the page.
You can do this by clicking the browser reload button.
It is a circular arrow-shaped icon at the top of the browser window, typically found in the upper-left side (you can also use keyboard shortcuts: Ctrl+R on PC and Command+R on Mac).