
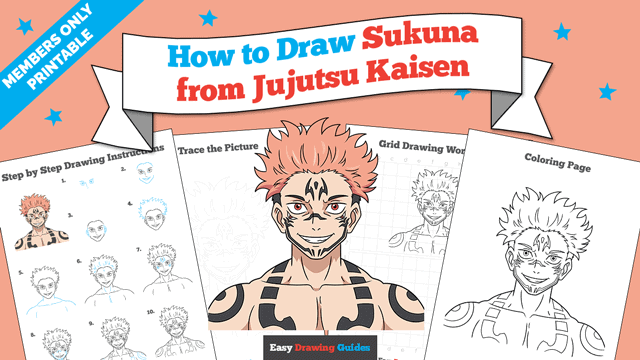
Learn how to draw a great looking Sukuna from Jujutsu Kaisen with easy drawing instructions and video tutorial.
By following the simple steps, you too can easily draw a perfect Sukuna from Jujutsu Kaisen.
Step-by-Step Instructions for Drawing Sukuna from Jujutsu Kaisen
How to Draw a Great Looking Sukuna from Jujutsu Kaisen for Kids and Beginners - Step 1
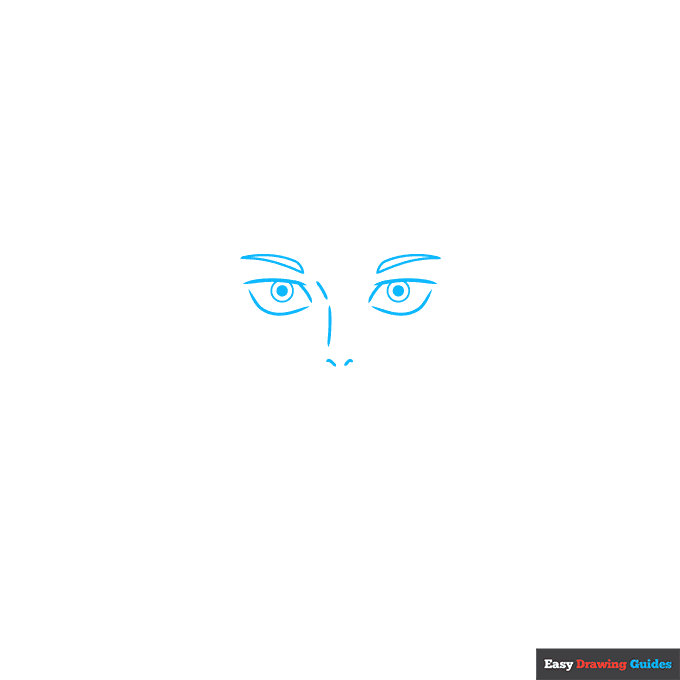
1. Begin the Sukuna from Jujutsu Kaisen outline by drawing the face. Use curved lines to outline the rectangular eyes, the pointed eyebrows, the bridge of the nose, and the nostrils.
Within each eye, draw a circle within a circle. Shade the inner circles to form the pupils of the eyes.
Drawing Step 2
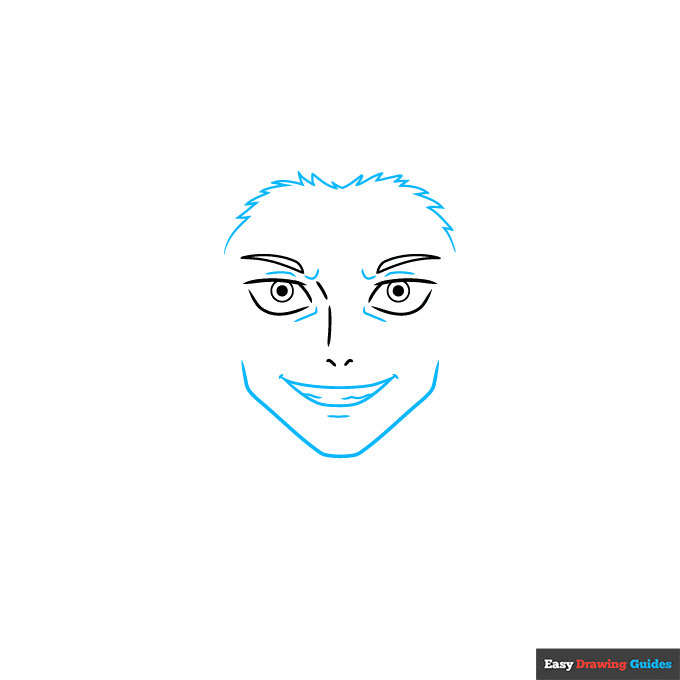
2. Use short curved lines to contour around the eyes. Use longer lines for the smiling mouth and chin. Use short lines to detail the teeth and contour the dimples of the chin and corners of the mouth.
Finally, use a series of short lines that meet at jagged points to form the hair above the forehead.
Unlock AD FREE and PRINTABLE drawing and coloring tutorials
- 2,600+ drawing & coloring PDFs
- 50+ ebooks
- Ad-free website
Drawing Step 3
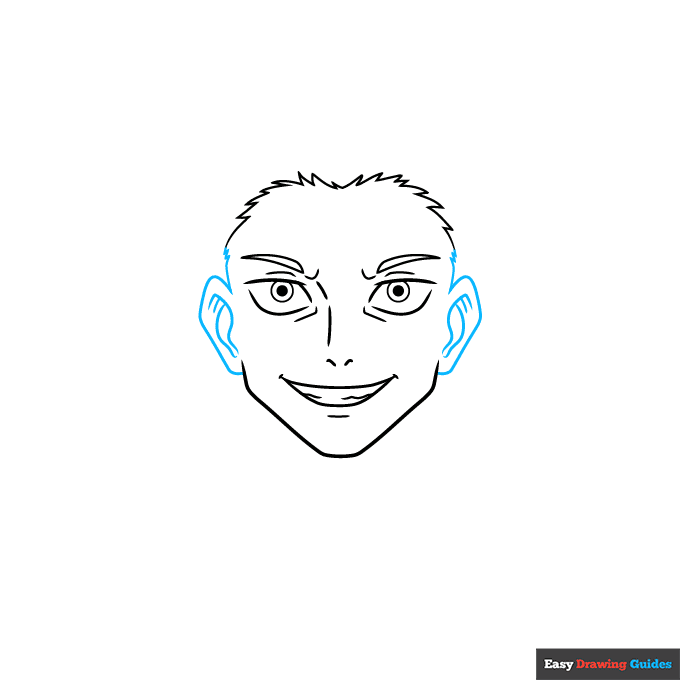
3. Draw the ears, and use curved lines to contour within them. Draw jagged hair above them, completing the outline of the face.
Drawing Step 4
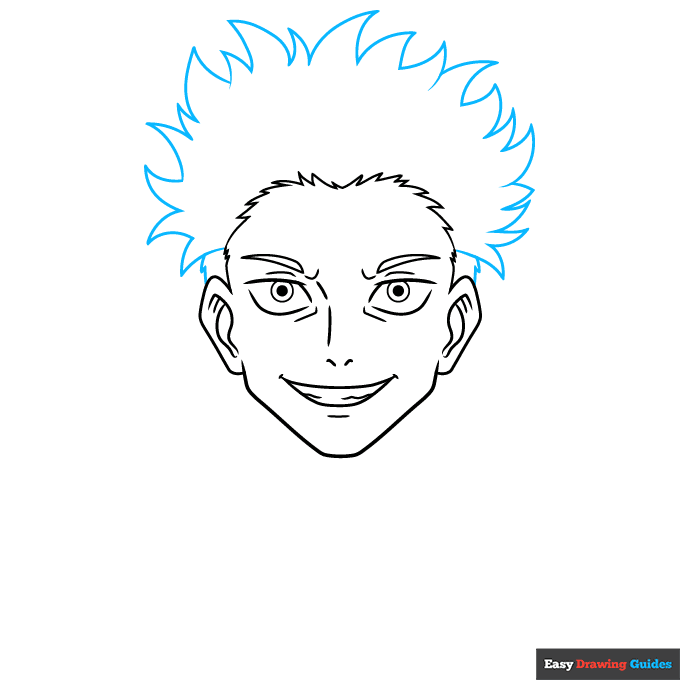
4. Use a series of curved lines that meet at jagged points to draw the spikey anime hair.
Drawing Step 5
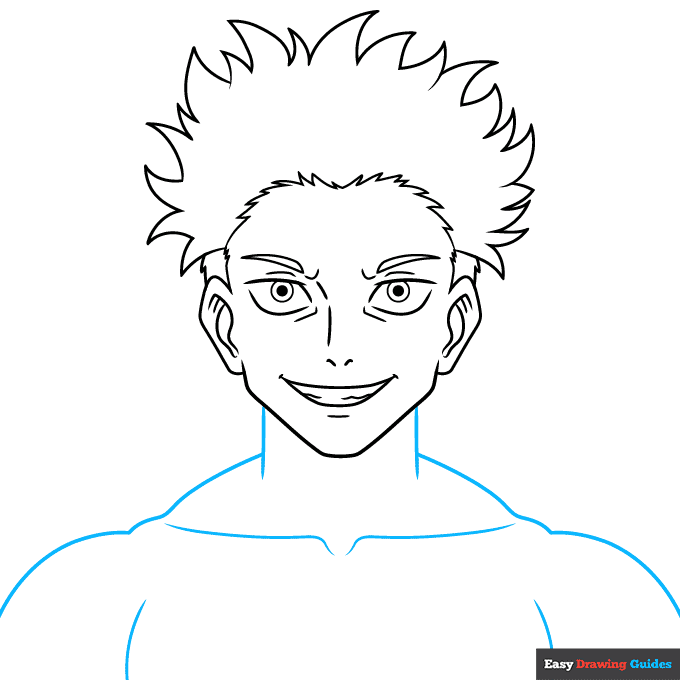
5. Extend two vertical lines below the face, forming the neck. Then, use curved lines to sketch the muscular shoulders, chest, and collar bones.
Drawing Step 6
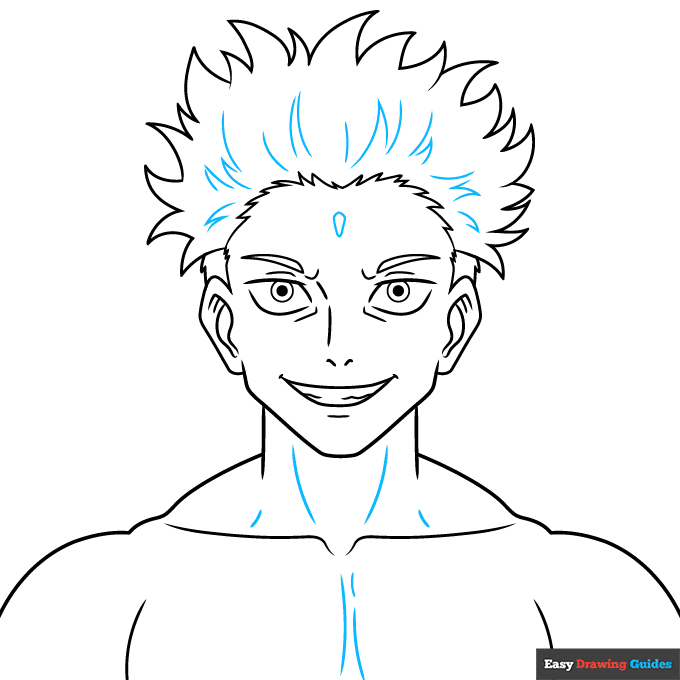
6. Contour the neck and chest muscles with curved lines. Texture the hair with short lines, some of which meet at jagged points. Then, draw an inverted teardrop shape in the middle of the forehead.
Drawing Step 7
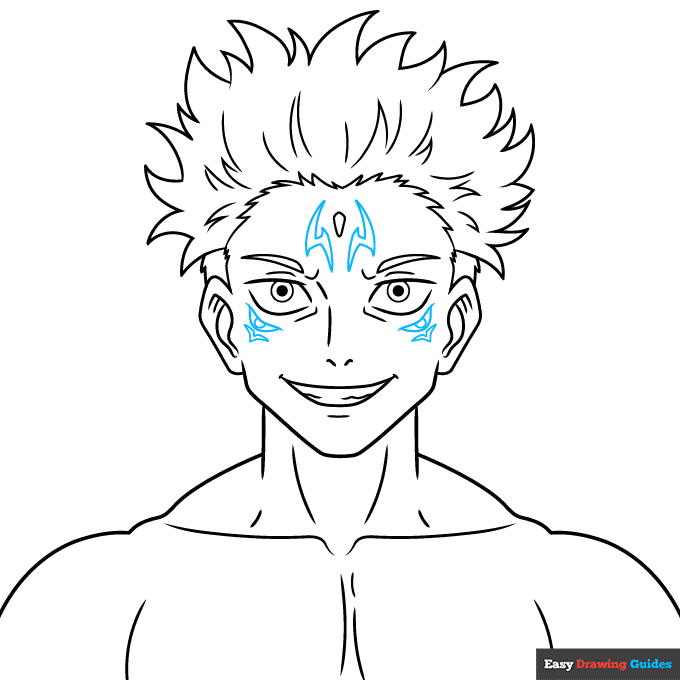
7. Use curved lines that meet at jagged points to draw lightning bolt shapes on the forehead. Use curved lines to outline an additional eye under each of the normal eyes. Enclose a partial oval inside each eye. Then, draw a curved "V" shape under each one.
Add More Details to Your Sukuna from Jujutsu Kaisen Picture - Step 8
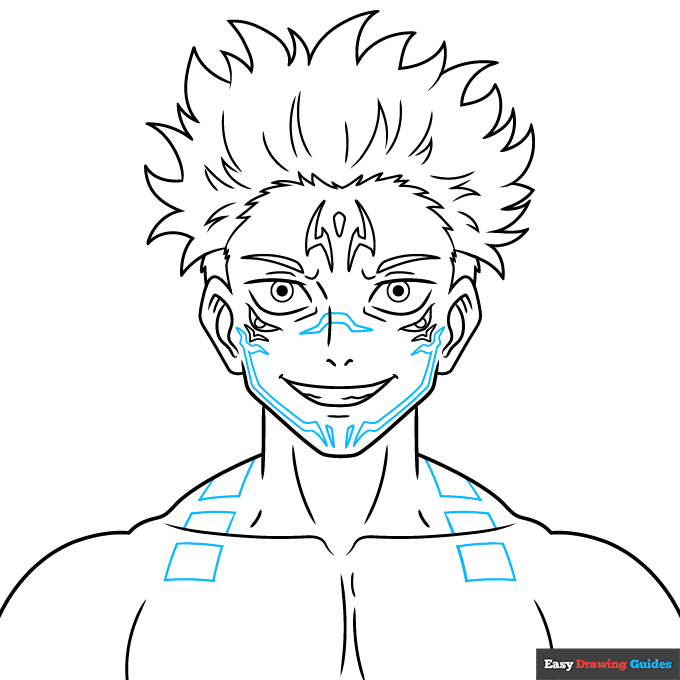
8. Use long and short curved lines that meet at points to draw branching lines across the nose, cheeks, and chin. Then enclose three squares or rectangles traversing each shoulder.
Complete the Outline of Your Sukuna from Jujutsu Kaisen Drawing - Step 9
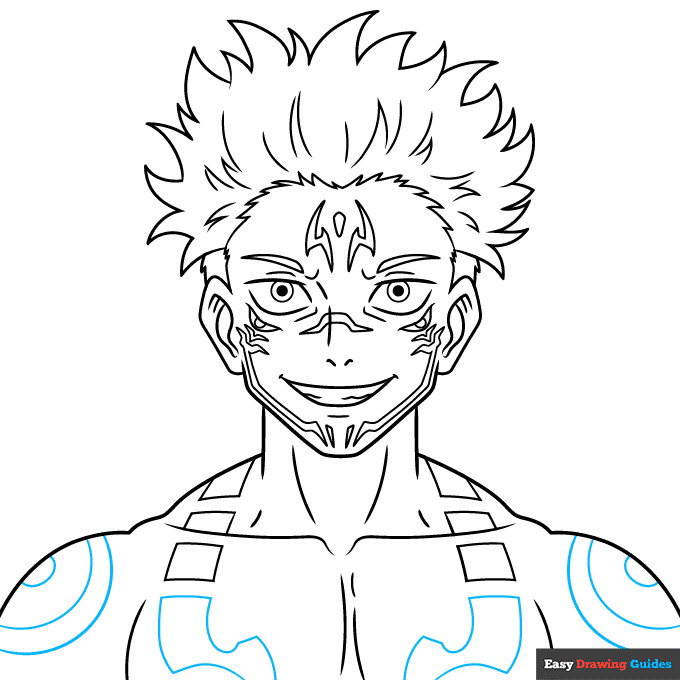
9. Use curved lines to enclose irregular shapes on the pectoral muscles, and concentric circles on the shoulders.
Color Your Sukuna from Jujutsu Kaisen Drawing
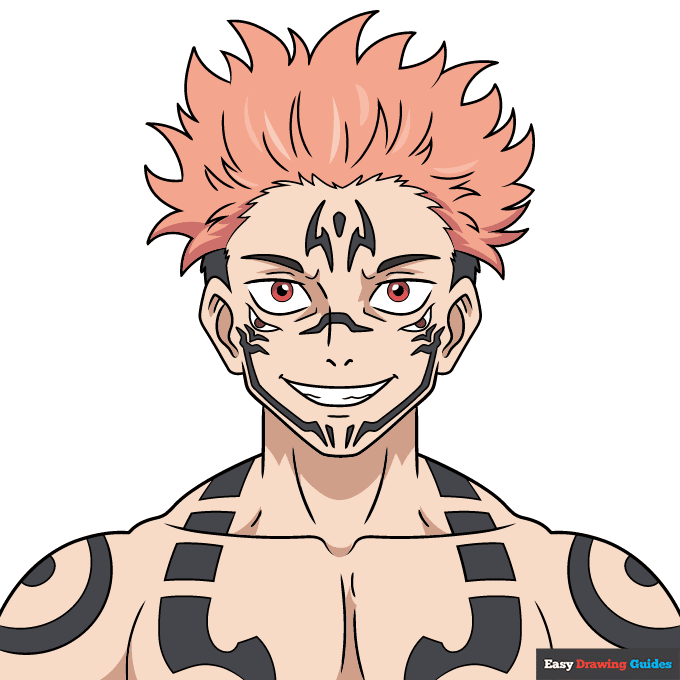
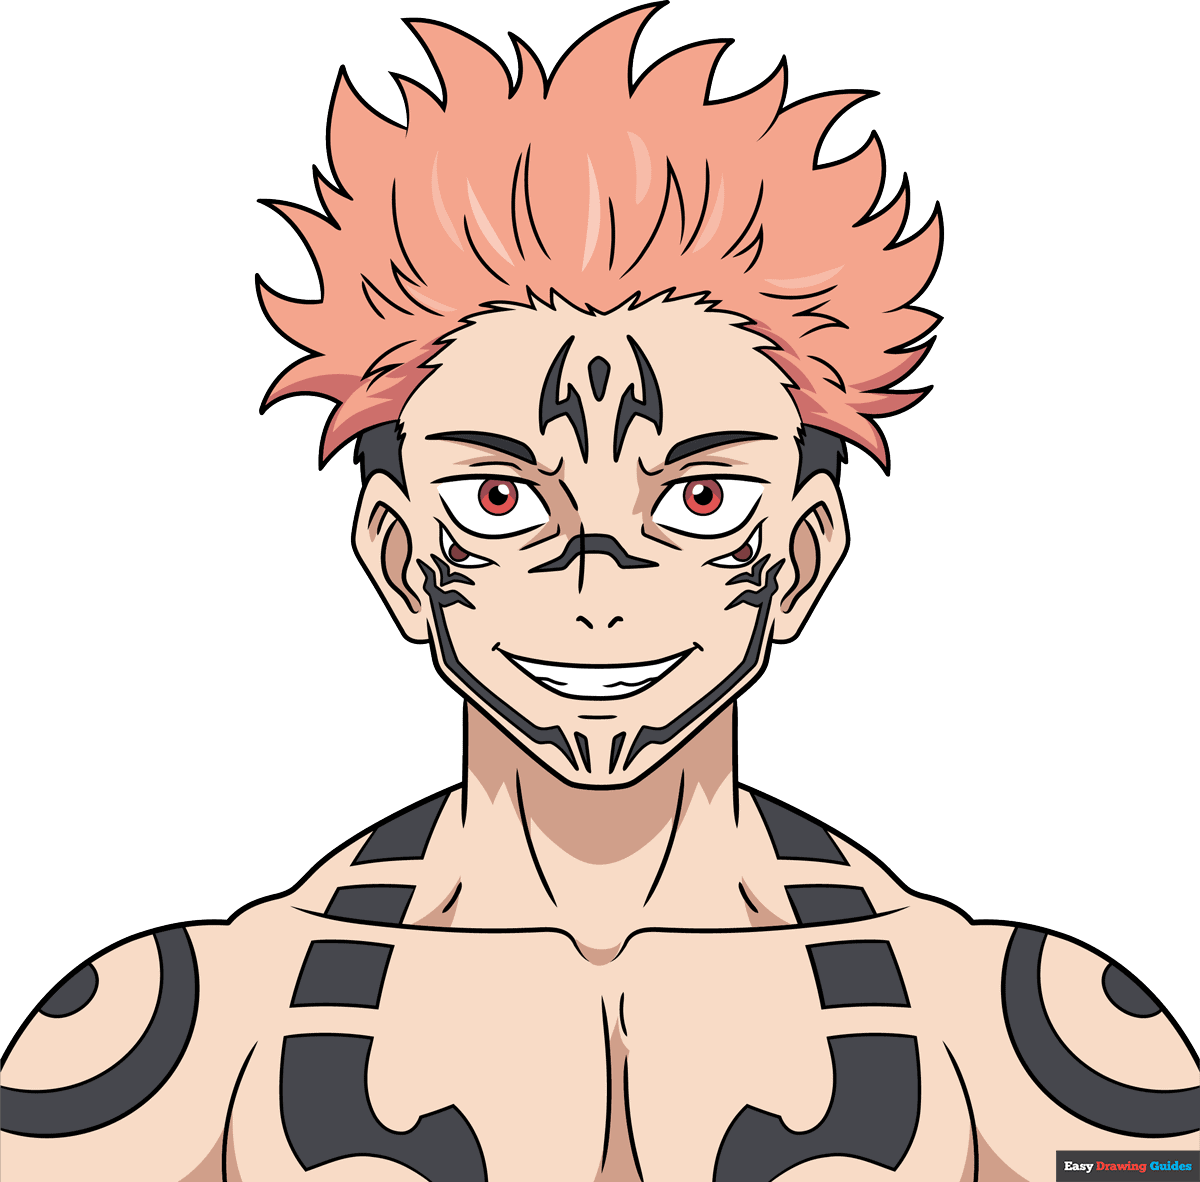
Your Sukuna from Jujutsu Kaisen is now complete. In this form, he has pink hair, black tattoos, and the irises of his eyes are red.
Watch 'How to Draw Sukuna from Jujutsu Kaisen' Video Tutorial
Click HERE to save the tutorial to Pinterest!
Learn More About The Sukuna from Jujutsu Kaisen Drawing
Ryomen Sukuna is a primary antagonist in the Jujutsu Kaisen anime and manga. Learn how to draw Sukuna from Jujutsu Kaisen with the help of this easy, step-by-step anime drawing tutorial.
Sukuna was the strongest jujutsu sorcerer in history. He was born over a thousand years ago. Known as the King of Curses, he was able to live on as a cursed object in the form of twenty indestructible fingers.
In this drawing, you can see Sukuna's face and muscular shoulders. He is in the form of Yuji Itadori, who became his host when he consumed one of the fingers. He has tattoos and a second set of eyes, a manifestation that Sukuna is in control.
Make a scene - don't forget to check out our other Jujutsu Kaisen character drawings.
Sukuna from Jujutsu Kaisen Drawing Tutorial - Easy & Fun Printable Pages
Join now and get immediate access to thousands of printable drawing instruction and practice pages!
Learn how to get access to thousands of printable pages!

MEMBER TROUBLESHOOTING
Still seeing ads or not being able to download the PDF?
First, check that you're logged in. You can log in on the member login page.
If you're still not able to download the PDF, the likely solution is to reload the page.
You can do this by clicking the browser reload button.
It is a circular arrow-shaped icon at the top of the browser window, typically found in the upper-left side (you can also use keyboard shortcuts: Ctrl+R on PC and Command+R on Mac).