Learn how to draw a great looking Parts of a Car for Kids with easy drawing instructions and video tutorial.
By following the simple steps, you too can easily draw a perfect Parts of a Car for Kids.
Step-by-Step Instructions for Drawing the Parts of a Car for Kids
How to Draw a Great Looking Parts of a Car for Kids for Kids and Beginners - Step 1

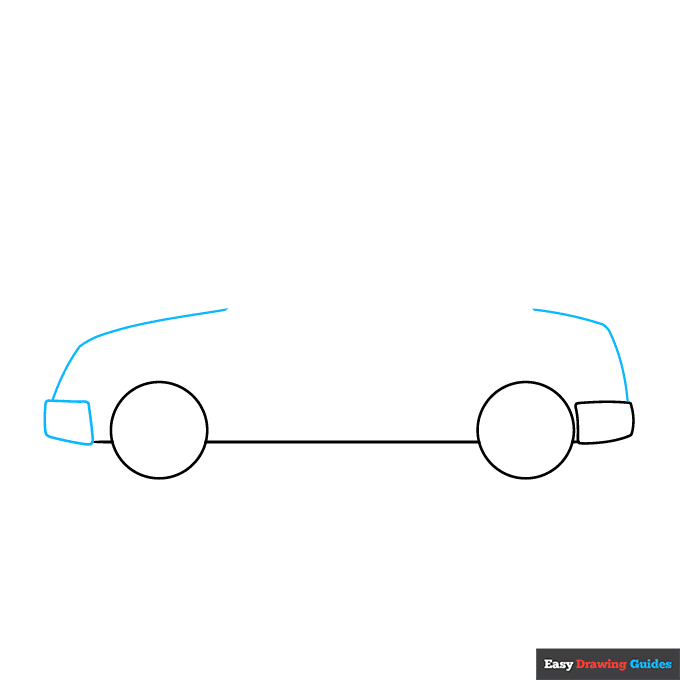
1. Begin the parts of a car for kids outline by drawing the tires. Draw two circles with a straight, horizontal line between them.
Extend a short line on the opposite side of each circle. Then enclose a curved rectangle shape to form the back bumper.
Drawing Step 2
2. Draw another irregular rectangle shape on the front to form the bumper. Extend curved lines upward from the bumpers to trace the hood and trunk of the car.
Unlock AD FREE and PRINTABLE drawing and coloring tutorials
- 1,900+ drawing & coloring PDFs
- 50+ ebooks
- Ad-free website
Drawing Step 3
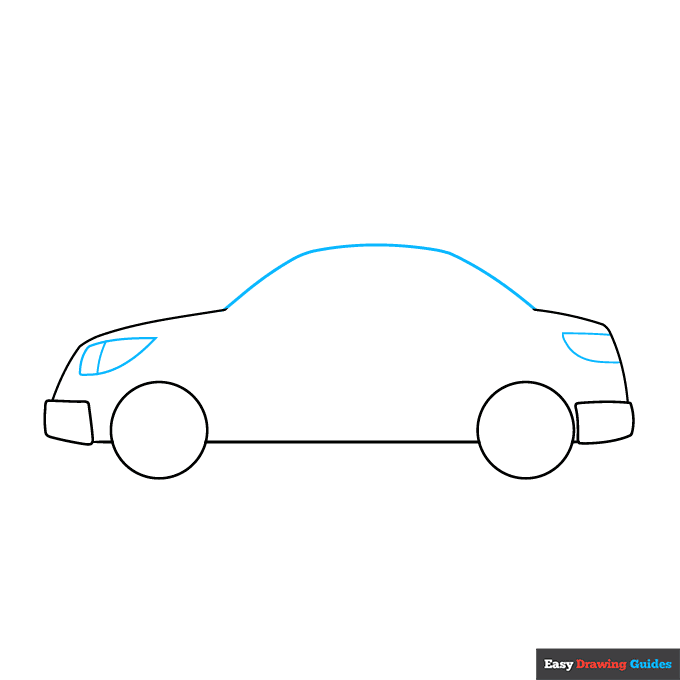
3. Connect the hood and trunk with a curved line, enclosing the car's cabin.
Then, draw pointed, curved shapes near the front and back. These are the headlights and taillights. Band the headlight with a vertical line.
Drawing Step 4
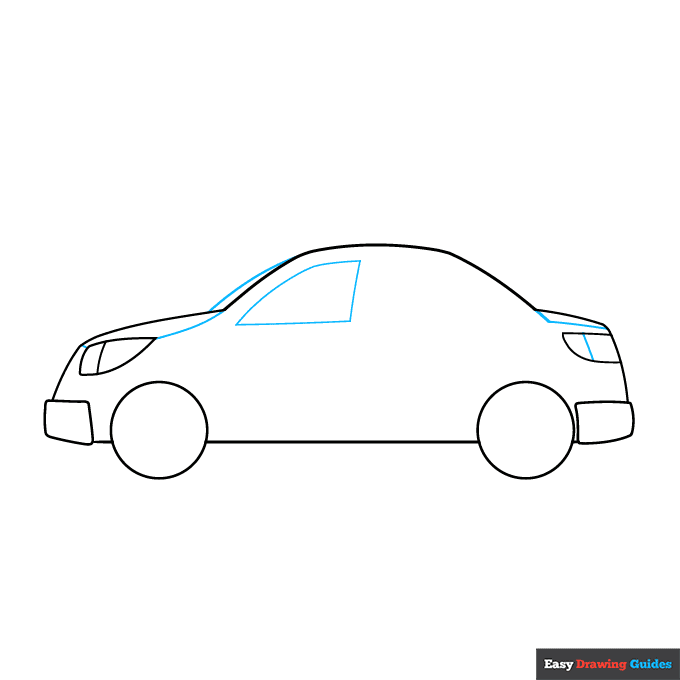
4. Enclose a curved triangle shape on the car's cabin. This is the driver's side window. Use a curved line to enclose the windshield and others to indicate the hood of the car, the trunk, and to detail the taillight.
Drawing Step 5
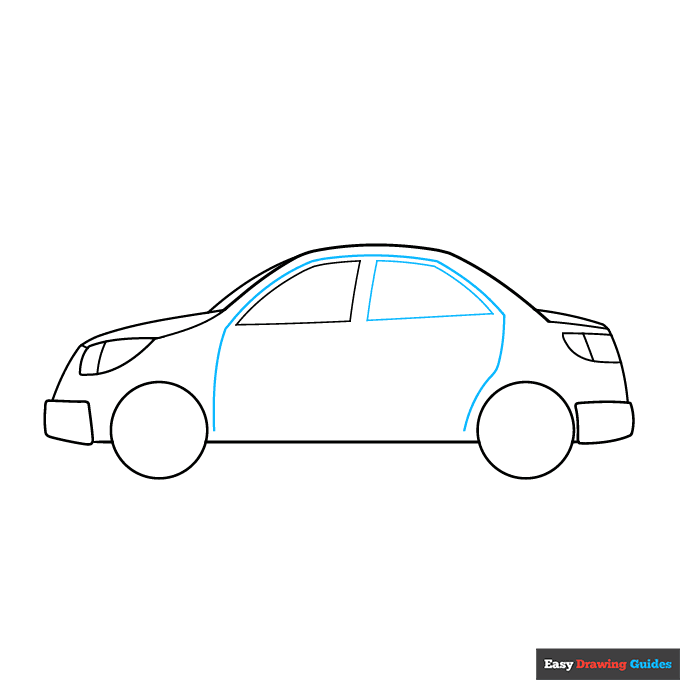
5. Draw another side window for the backseat. Then use a long curved line to form the shape of the doors.
Drawing Step 6
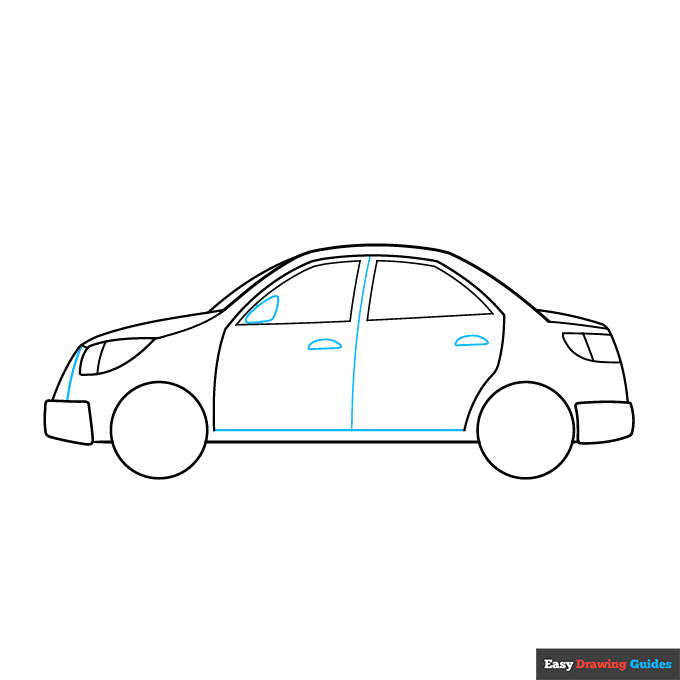
6. Use horizontal and vertical lines to complete the doors. Then, draw small rounded shapes for the mirror and door handles. Outline the grill with a vertical line.
Drawing Step 7
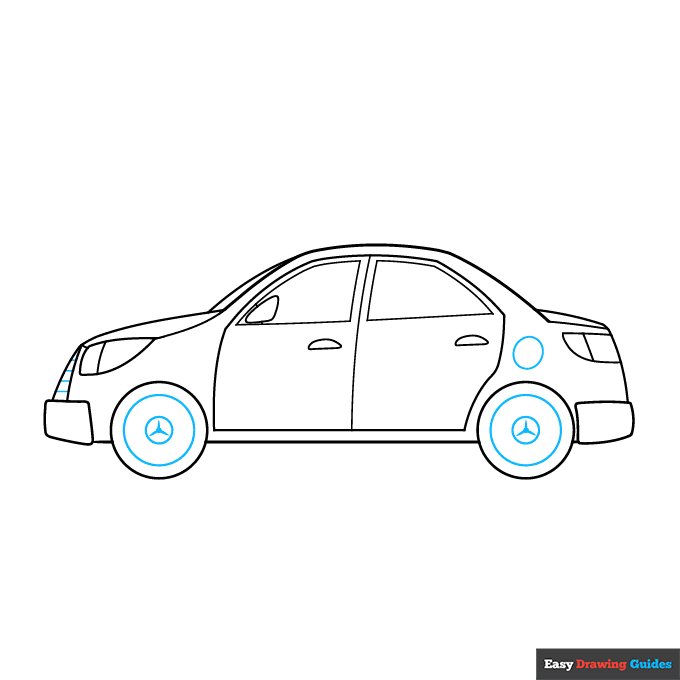
7. Draw circles to form the gas cap, wheels, and hubcaps. On the hubcaps, shade a small circle and extend three thick lines in a triangular star pattern. This is the logo for Mercedes-Benz.
Add More Details to Your Parts of a Car for Kids Picture - Step 8
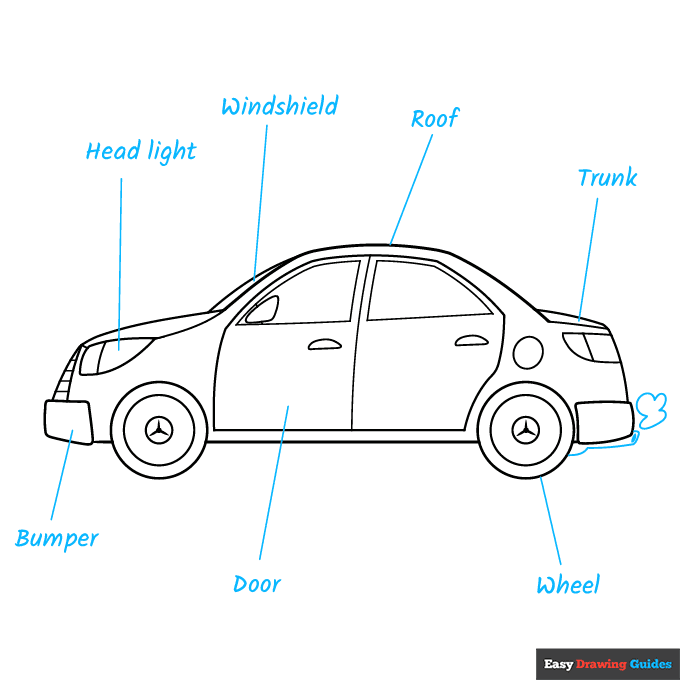
8. Use curved lines to outline the tailpipe and smoke coming out of it. Shade a small oval for the opening.
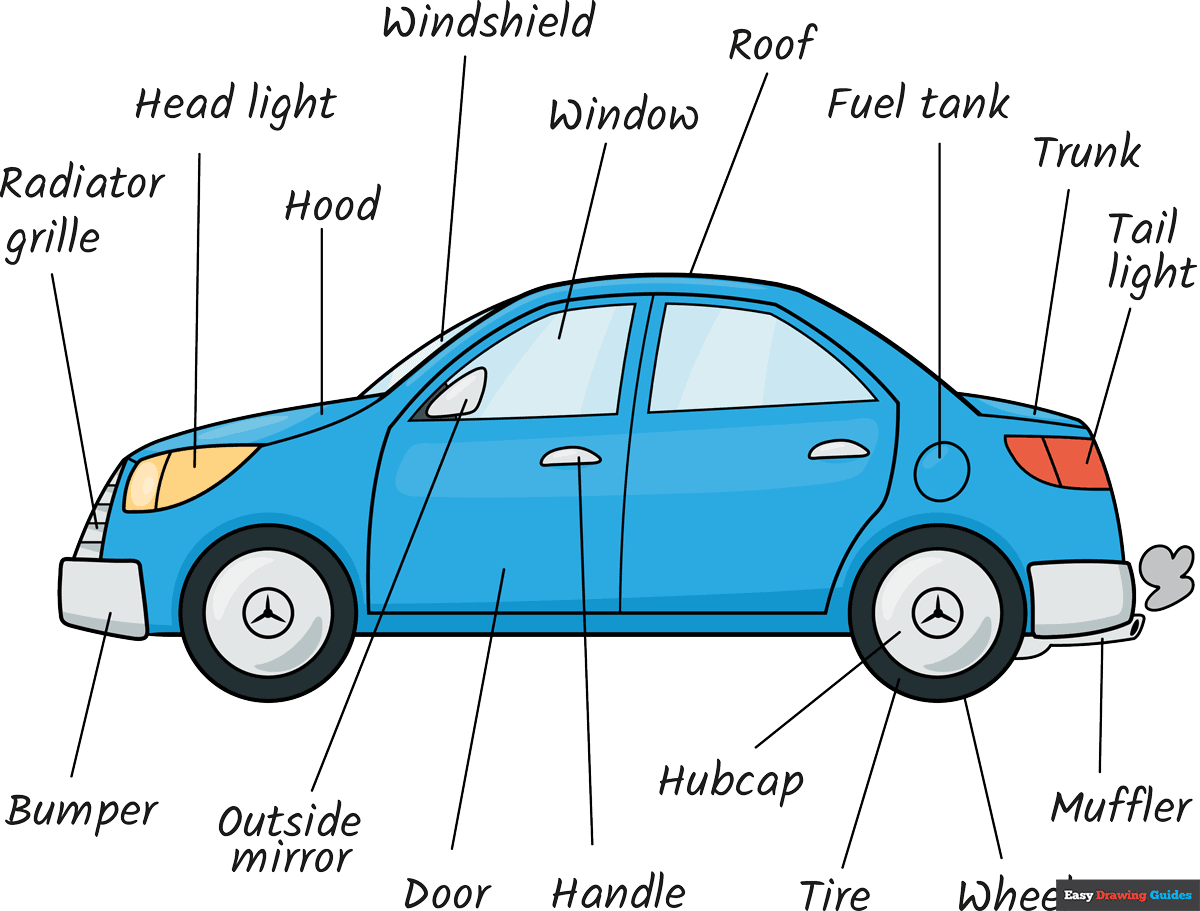
Then, begin labeling the parts of the car. Working clockwise, label the headlight, windshield, roof, trunk, wheel, door, and bumper. Draw straight lines from the words to the parts they describe.
Complete the Outline of Your Parts of a Car for Kids Drawing - Step 9
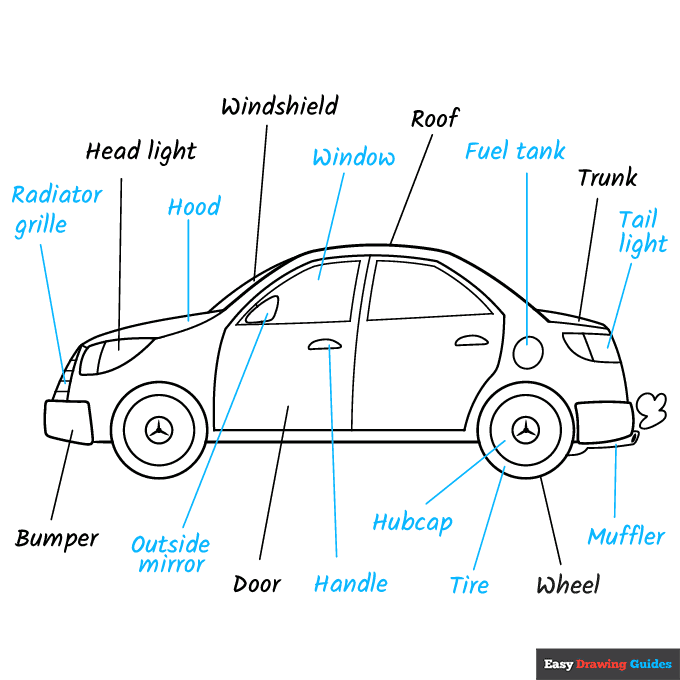
9. Label more parts, including the radiator grille, hood, window, fuel tank, tail light, muffler, tire, hubcap, handle, and outside mirror, drawing lines to their respective parts.
Color Your Parts of a Car for Kids Drawing
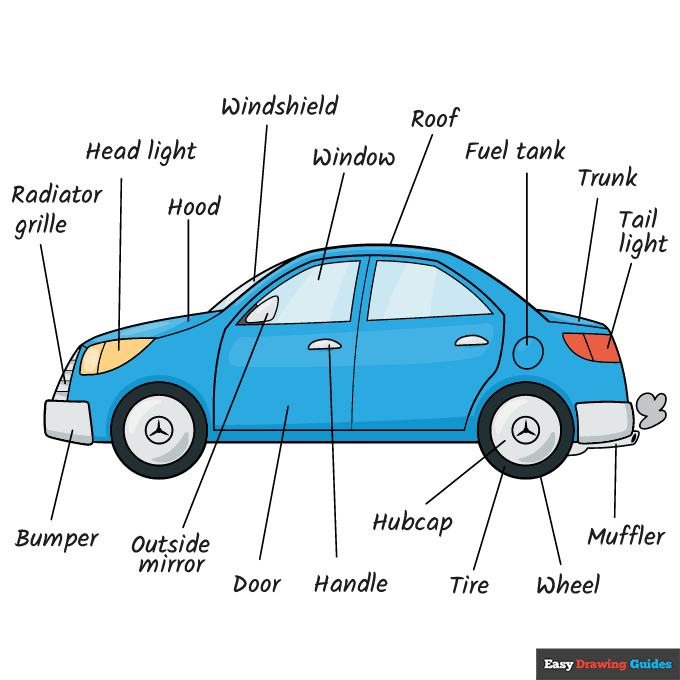
Your parts of a car for kids outline is now complete. Color your diagram. You can design the car's paint job to make it your dream car.
Watch 'How to Draw the Parts of a Car for Kids' Video Tutorial
Click HERE to save the tutorial to Pinterest!
Learn More About The Parts of a Car for Kids Drawing
Do you love cars? Whether you want to drive them, admire them, fix them, or design them, it's important to know the correct names of all their parts.
You'll learn the basics as you complete this parts of a car for kids drawing.
Cars or automobiles have been around for well over 100 years. Each year, they've looked a little bit different, but most cars have shared the basic parts you'll find in this diagram.
According to the logo on the hubcaps, this car is a Mercedes-Benz. Would you like to learn how to draw more specific car brands? You can learn how to draw a Lamborghini or a Jeep drawing.
Other vehicles also have similar parts. Could you label this truck drawing?
Parts of a Car for Kids Drawing Tutorial - Easy & Fun Printable Pages
Join now and get immediate access to thousands of printable drawing instruction and practice pages!

Learn how to get access to thousands of printable pages!

MEMBER TROUBLESHOOTING
Still seeing ads or not being able to download the PDF?
First, check that you're logged in. You can log in on the member login page.
If you're still not able to download the PDF, the likely solution is to reload the page.
You can do this by clicking the browser reload button.
It is a circular arrow-shaped icon at the top of the browser window, typically found in the upper-left side (you can also use keyboard shortcuts: Ctrl+R on PC and Command+R on Mac).