Learn how to draw a great looking Parts of a Guitar with easy drawing instructions and video tutorial.
By following the simple steps, you too can easily draw a perfect Parts of a Guitar.
Step-by-Step Instructions for Drawing Parts of a Guitar
How to Draw a Great Looking Parts of a Guitar for Kids and Beginners - Step 1
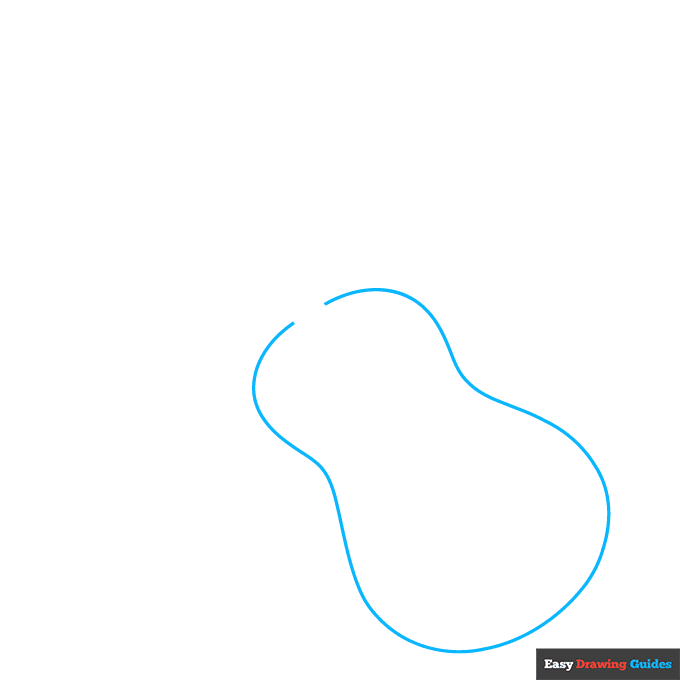
1. Begin the parts of a guitar outline by using curved lines to trace the peanut-like shape of the guitar body.
Drawing Step 2
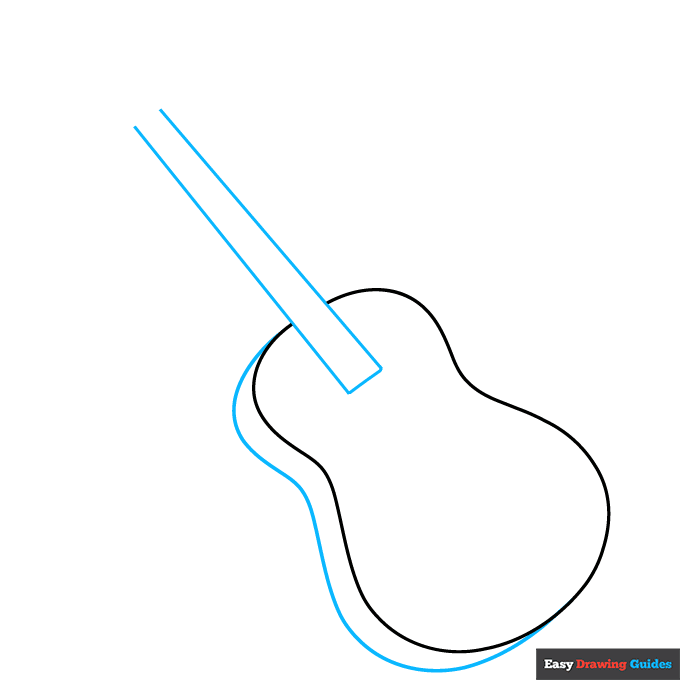
2. Make the guitar three-dimensional by drawing a curved line along one side. Then use three lines to draw a long, incomplete rectangle shape at the top of the body. This is the neck of the guitar.
Unlock AD FREE and PRINTABLE drawing and coloring tutorials
- 1,900+ drawing & coloring PDFs
- 50+ ebooks
- Ad-free website
Drawing Step 3
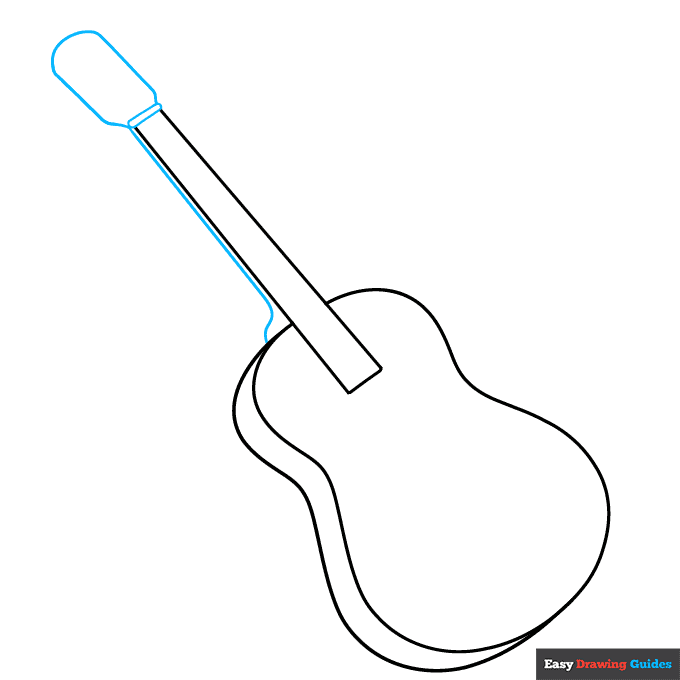
3. Draw a long line parallel to the neck. At its top, draw a small and large rounded rectangle. This makes the head of the guitar.
Drawing Step 4
4. Draw oval-shaped tuner knobs along the sides of the guitar head, erasing as necessary. Use curved and straight lines to give the head a three-dimensional shape.
Drawing Step 5
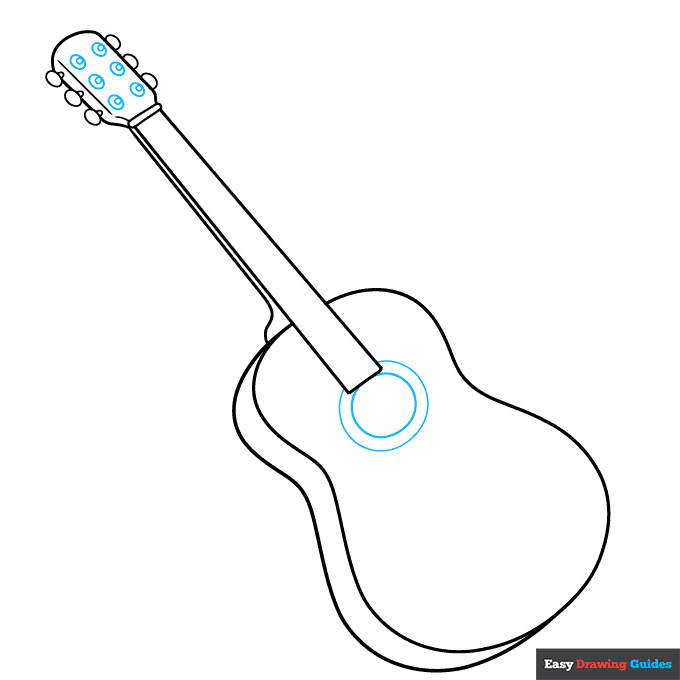
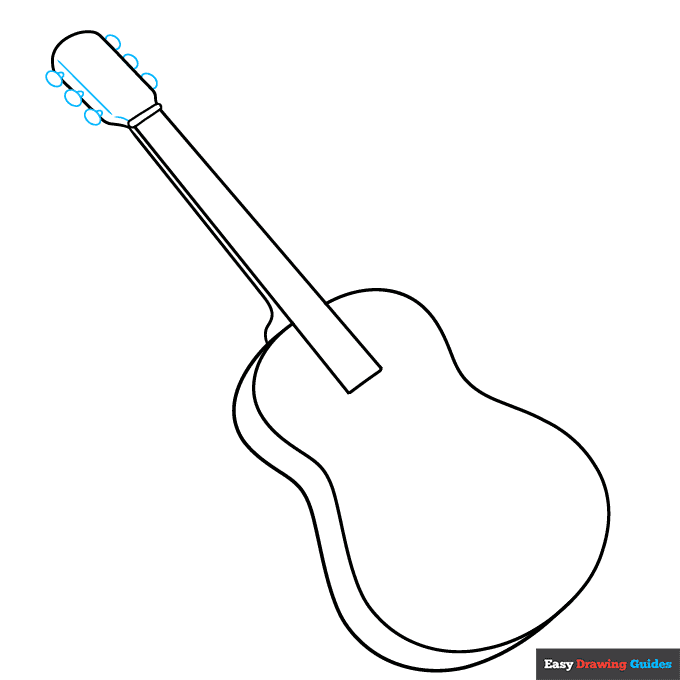
5. Draw six ovals on the head, with a smaller oval inside each one. Then, draw a circle within a circle at the base of the neck.
Drawing Step 6
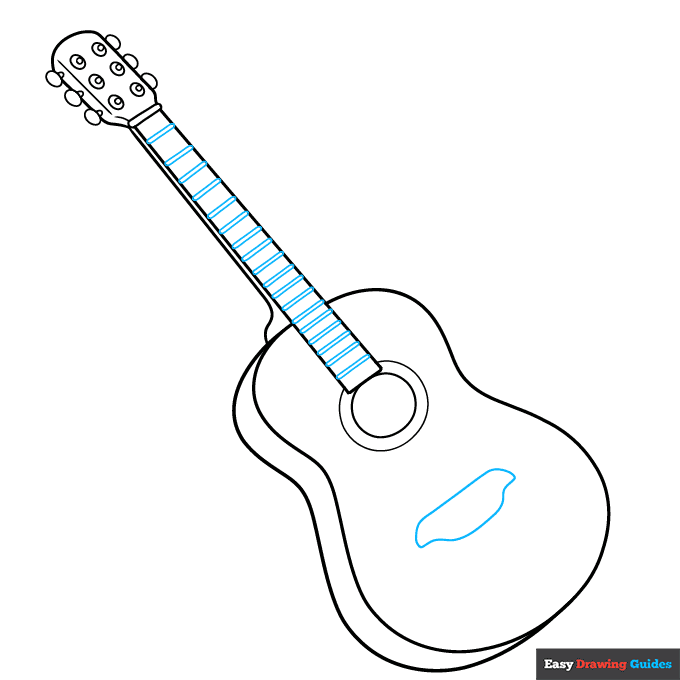
6. Draw pairs of straight lines across the neck of the guitar. These are the frets. Notice how they are slightly farther apart at the top than at the bottom.
Then, use a curved line to form the irregular shape of the bridge.
Drawing Step 7
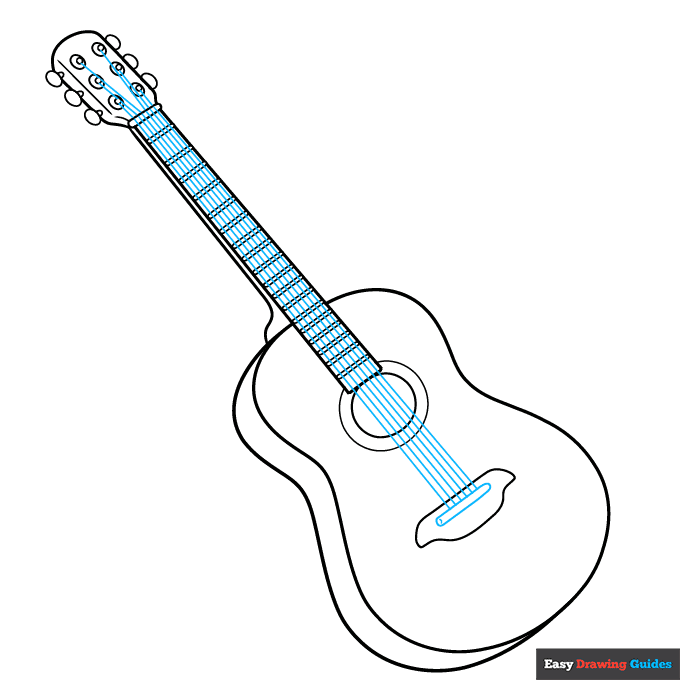
7. Enclose a long rounded shape on the bridge, then draw the six strings of the guitar. Extend straight lines from the bridge to the head.
Add More Details to Your Parts of a Guitar Picture - Step 8
8. Draw a scalloped line on the bridge. Then, begin labeling the parts of the guitar.
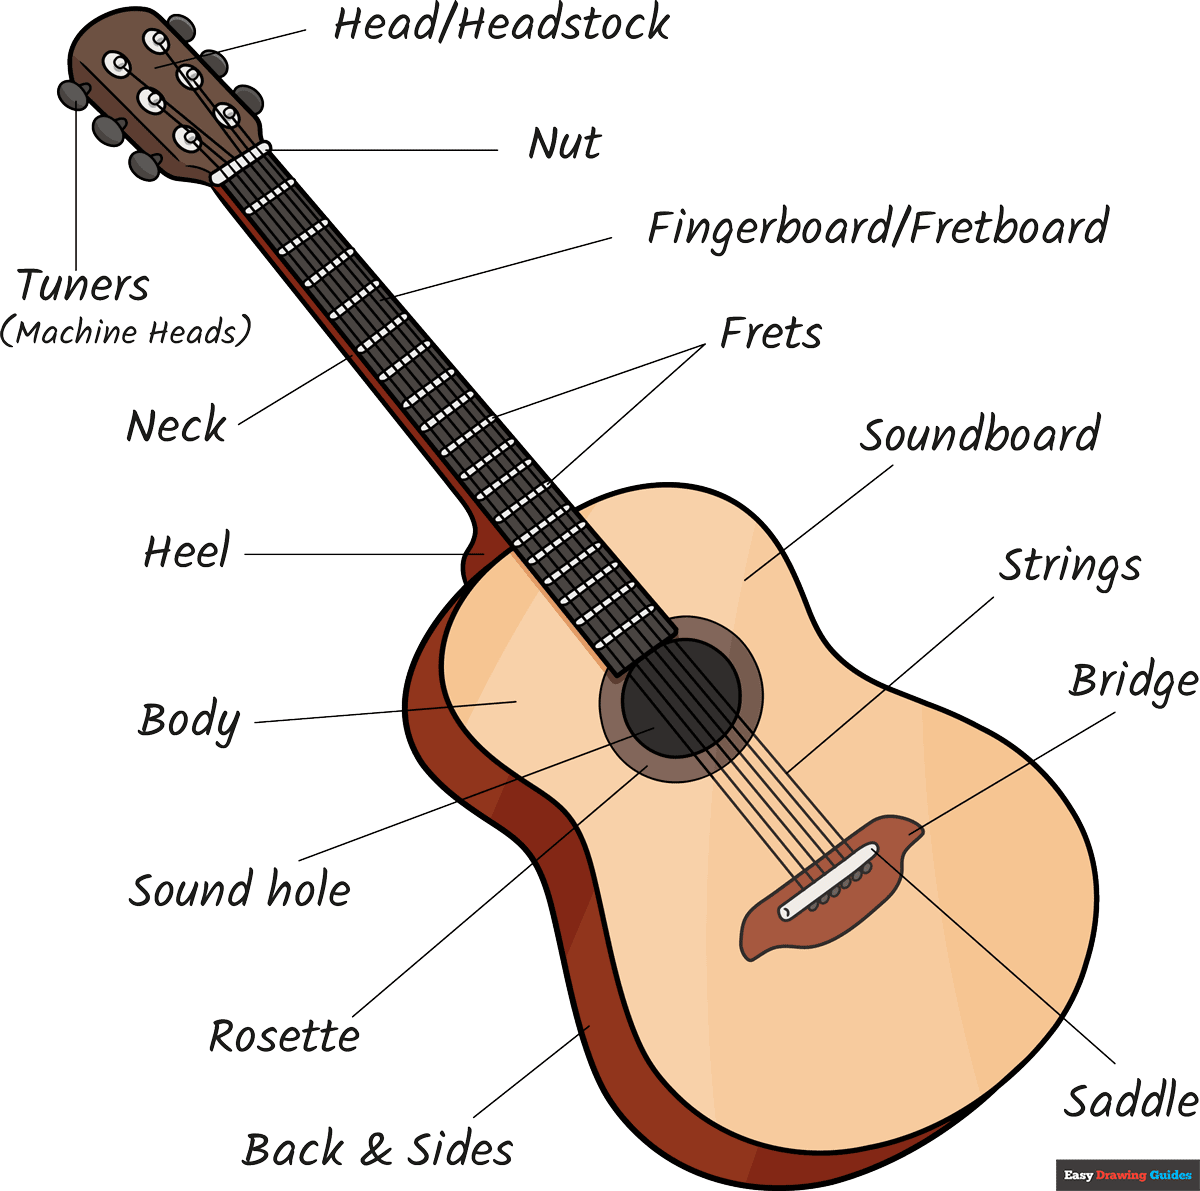
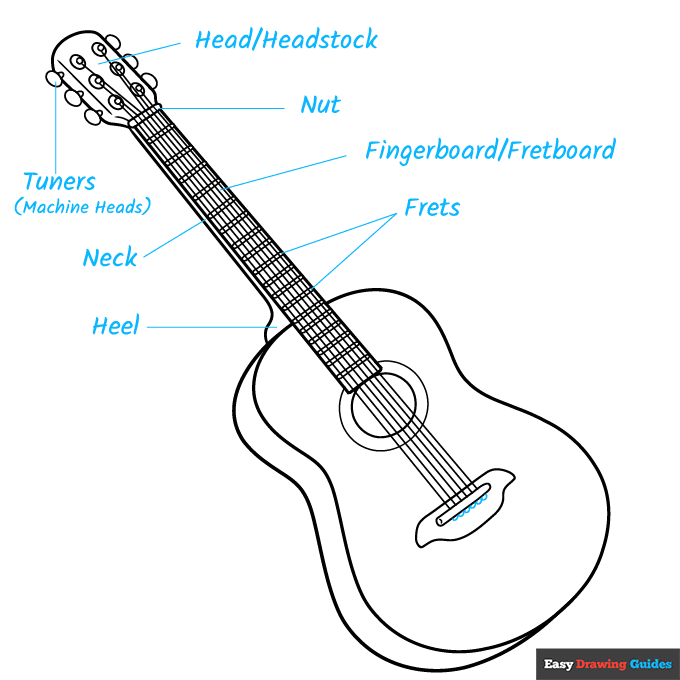
Starting at the top of the guitar body and working clockwise, label the heel, neck, tuners or machine heads, the head or headstock, nut, fingerboard or fretboard, and frets.
Draw straight lines from each term to the part it describes.
Complete the Outline of Your Parts of a Guitar Drawing - Step 9
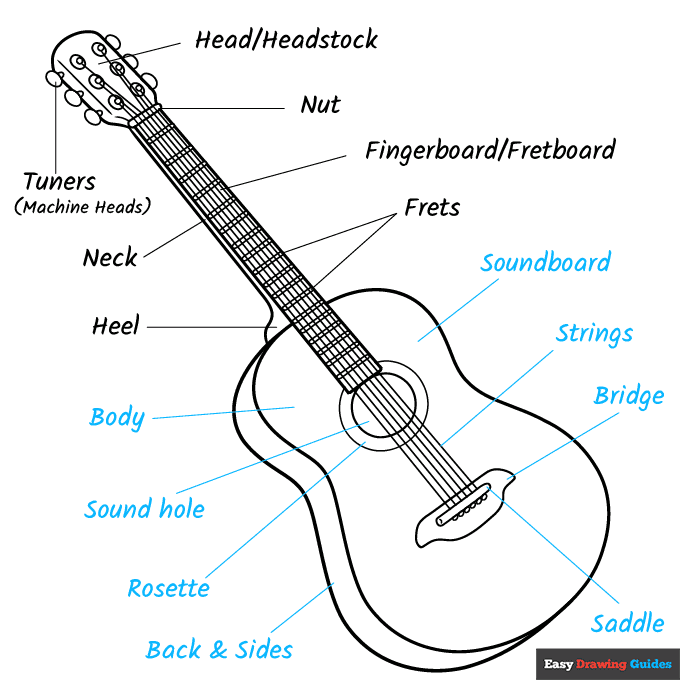
9. Continue labeling the soundboard, strings, bridge, saddle, back and sides, rosette, sound hole, and body. Again, draw lines from the words to the instrument.
Color Your Parts of a Guitar Drawing
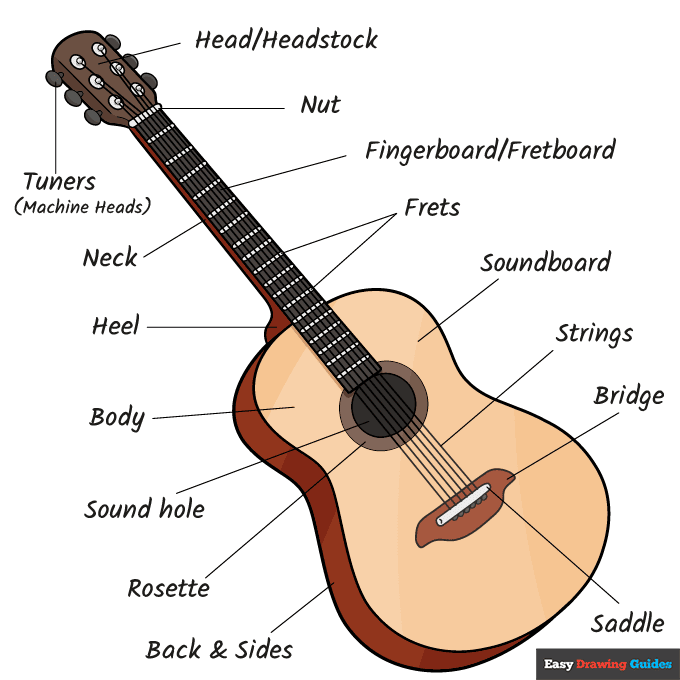
Your parts of a guitar outline is now complete. Color your diagram. Acoustic guitars are usually tan in color, but they can be stained or painted any color.
Watch 'How to Draw Parts of a Guitar' Video Tutorial
Learn More About The Parts of a Guitar Drawing
Would you like to learn how to play the guitar? It can help to know what all of its parts are called. You can learn about them with the help of this parts of a guitar drawing.
To create this diagram, you will start by drawing an acoustic guitar. Then you will get to add the parts that help it make music.
Guitars are musical instruments that have metal or plastic strings acting as a sound generator, producing the sound. The wooden boxlike portion is the resonator; it makes the sound louder.
Could you label the same parts on an electric guitar? Try your hand at this electric guitar drawing and find out.
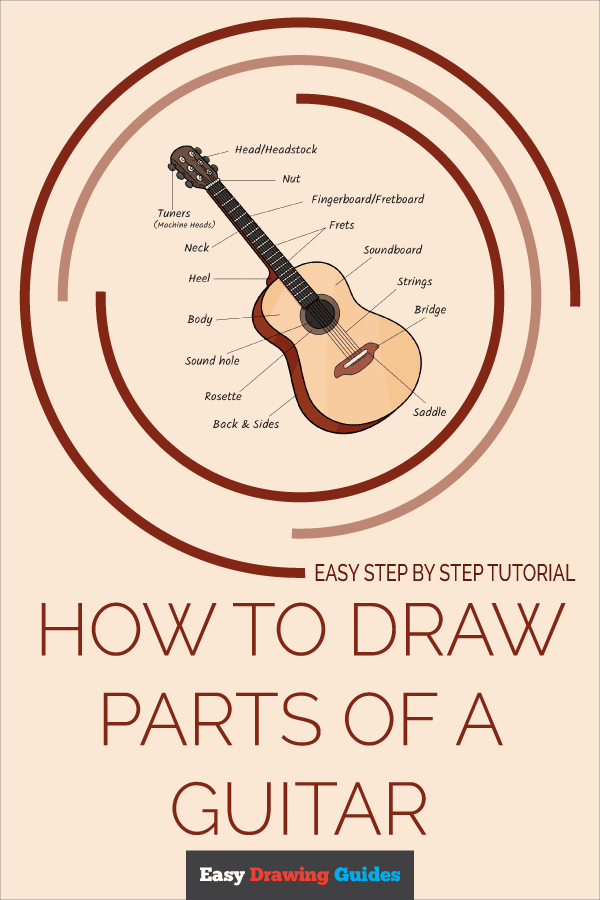
Parts of a Guitar Drawing Tutorial - Easy & Fun Printable Pages
Join now and get immediate access to thousands of printable drawing instruction and practice pages!

Learn how to get access to thousands of printable pages!

MEMBER TROUBLESHOOTING
Still seeing ads or not being able to download the PDF?
First, check that you're logged in. You can log in on the member login page.
If you're still not able to download the PDF, the likely solution is to reload the page.
You can do this by clicking the browser reload button.
It is a circular arrow-shaped icon at the top of the browser window, typically found in the upper-left side (you can also use keyboard shortcuts: Ctrl+R on PC and Command+R on Mac).