Learn how to draw a great looking Orchid in a Pot with easy drawing instructions and video tutorial.
By following the simple steps, you too can easily draw a perfect Orchid in a Pot.
Step-by-Step Instructions for Drawing an Orchid in a Pot

How to Draw a Great Looking Orchid in a Pot for Kids and Beginners - Step 1

1. Begin the orchid in a pot outline by drawing its pot. Use a long “U” shaped line to form the deep pot used to grow orchids.
Enclose a partial oval shape near the top, and use a wavy line to indicate the potting medium. Then, extend a pair of curved lines to form the sides of the leaf.
Drawing Step 2

2. Use long curved lines, doubled back on themselves, to complete the first leaf and enclose three more.
The leaves should overlap one another. Use long curved lines to draw veins down the centers of the leaves.
Unlock AD FREE and PRINTABLE drawing and coloring tutorials
- 1,900+ drawing & coloring PDFs
- 50+ ebooks
- Ad-free website
Drawing Step 3
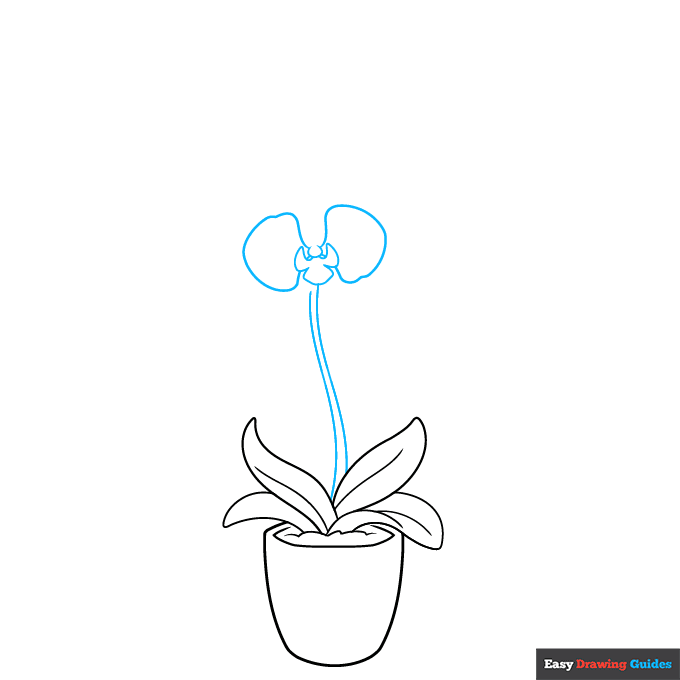
3. Extend a pair of long curved lines upward from the leaves. This is the orchid’s stem. Just above the stem, use curved lines to enclose the three-lobed shape of the central petals.
Draw a “C” shaped line just above this shape. Then, use long curved lines to enclose rounded half-circle shapes on each side of it.
Drawing Step 4
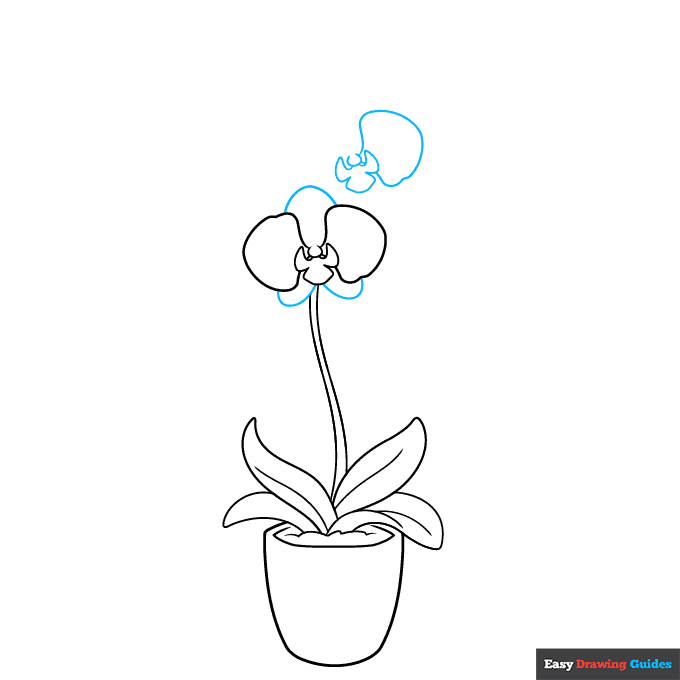
4. Use curved lines to enclose a petal above and two petals below the others.
Then, begin sketching a second orchid blossom above the first. Use curved lines to sketch the three-lobed central petals, the “C” shape above them, and the semicircular side petal.
Drawing Step 5
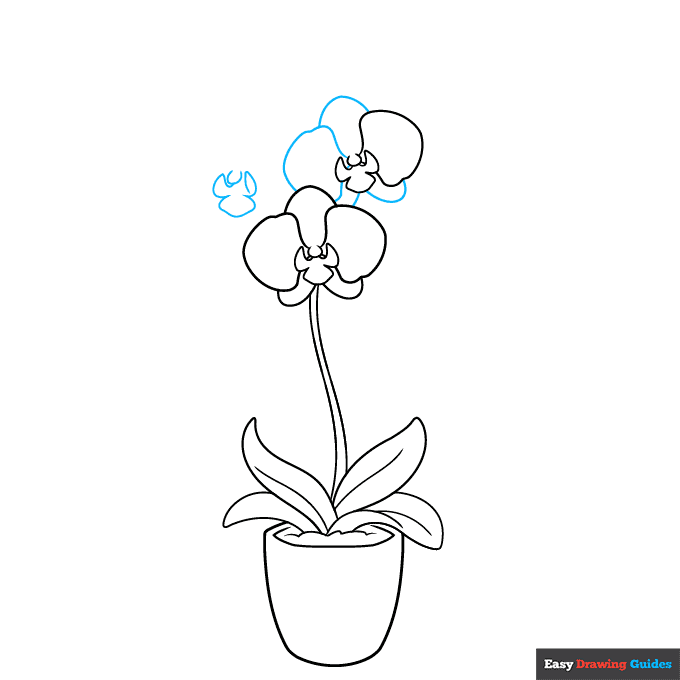
5. Use long curved lines to enclose the four remaining petals and begin the third orchid blossom.
Drawing Step 6
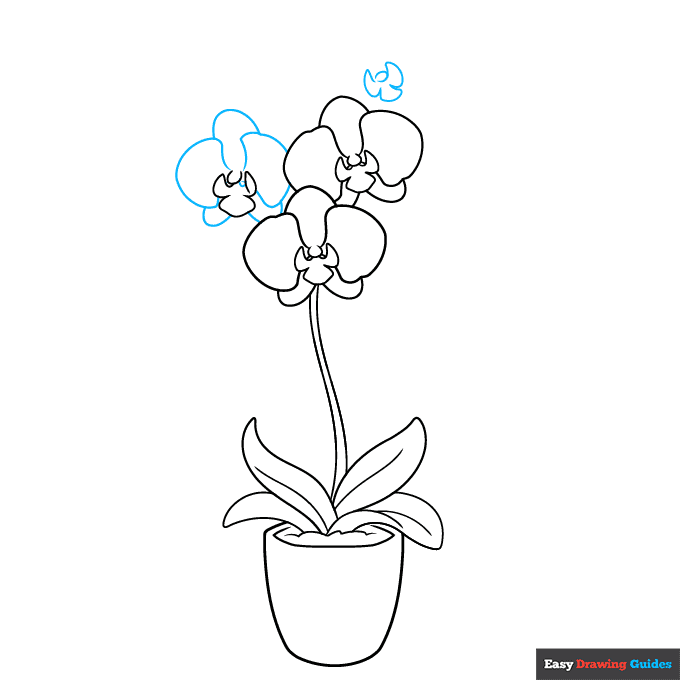
6. Use long curved lines to enclose the four outer petals. Then, begin drawing the three-lobed center of a fourth flower.
Drawing Step 7
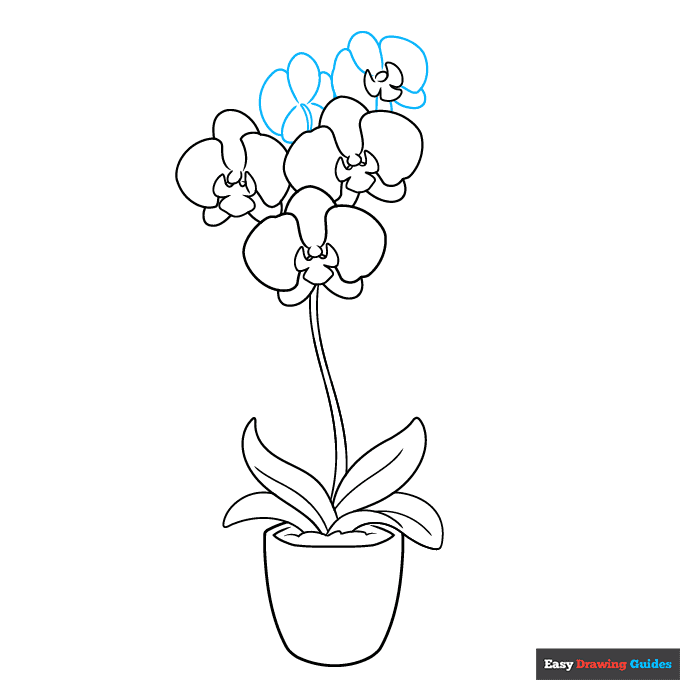
7. Use long curved lines to enclose the five outer petals of the fourth blossom and the fifth.
Add More Details to Your Orchid in a Pot Picture - Step 8
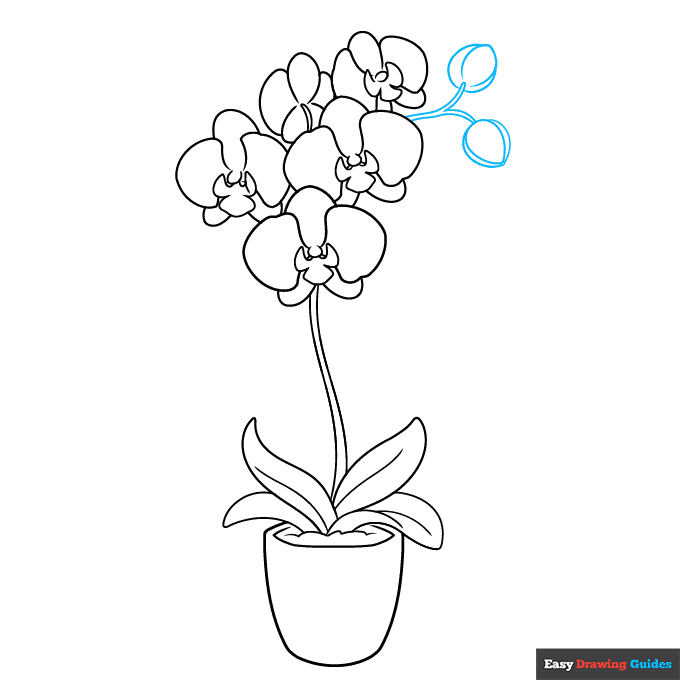
8. Use curved lines to extend a “Y” shaped stem from between the third and fourth flowers. Then, use curved lines to enclose and detail the stout, teardrop-shaped buds at the tips.
Complete the Outline of Your Orchid in a Pot Drawing - Step 9
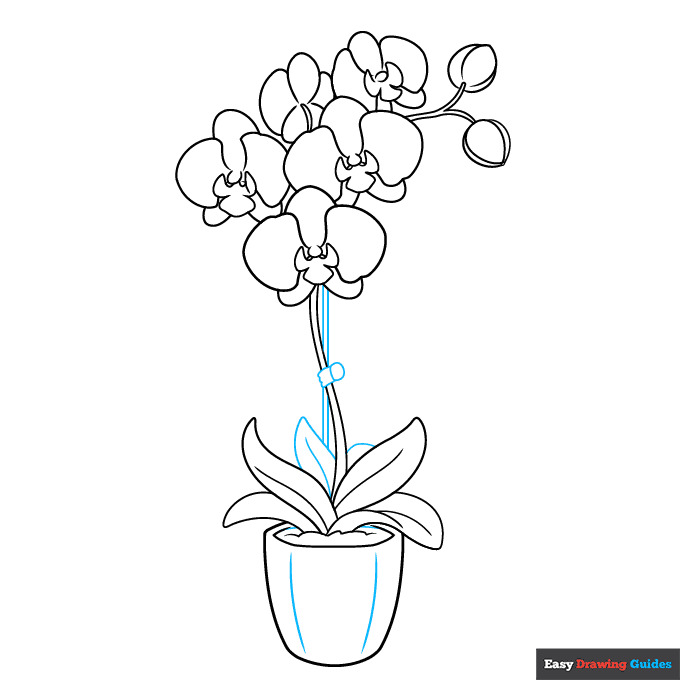
9. Add a few final details to your drawing. Texture the pot with vertical lines. Enclose two additional leaves and draw a vein down the center.
Extend a pair of lines to form a plant support stick behind the stem. Enclose a rounded rectangle and an oval where they meet, erasing as necessary.
Color Your Orchid in a Pot Drawing
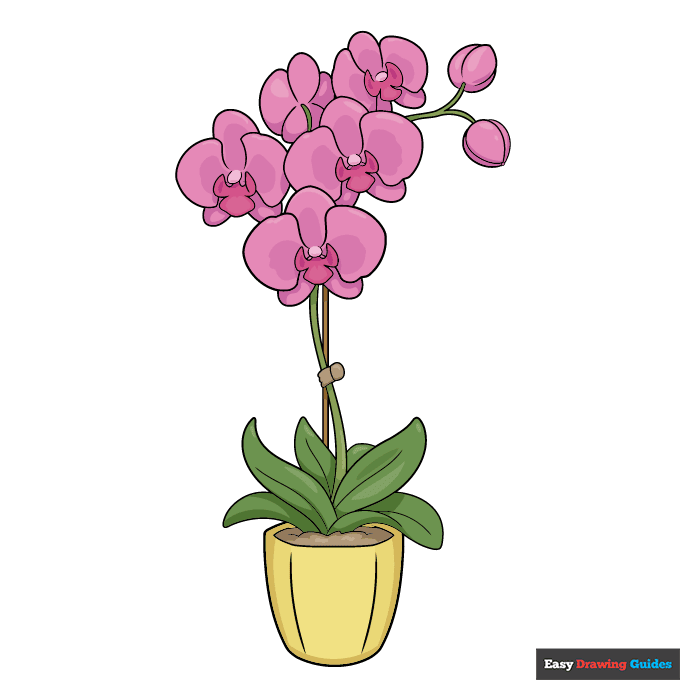
Your orchid in a pot outline is now complete. Color your flower. Orchids are often white, pink, purple, yellow, or a combination of these colors.
Watch 'How to Draw an Orchid in a Pot' Video Tutorial
Learn More About The Orchid in a Pot Drawing
Orchids are exotic, brightly colored flowers that many people keep as houseplants. You can add an orchid - or several! - to your collection when you learn how to draw an orchid in a pot.
There are thousands of different types of orchids. This orchid is a Phalaenopsis or moth orchid.
The latter name describes the moth-like shape of the petals. Check out this moth drawing to compare their shapes.
Some people think the orchid also resembles a lion's face drawing. Can you see the portions of the petals that look a bit like a lion's nose, its lower jaw with canine teeth, and its mane?
One more thing you might notice about this drawing is how deep the pot is. Orchids are kept in pots that are taller than other plants because of the way their roots grow.
Orchid in a Pot Drawing Tutorial - Easy & Fun Printable Pages
Join now and get immediate access to thousands of printable drawing instruction and practice pages!

Learn how to get access to thousands of printable pages!

MEMBER TROUBLESHOOTING
Still seeing ads or not being able to download the PDF?
First, check that you're logged in. You can log in on the member login page.
If you're still not able to download the PDF, the likely solution is to reload the page.
You can do this by clicking the browser reload button.
It is a circular arrow-shaped icon at the top of the browser window, typically found in the upper-left side (you can also use keyboard shortcuts: Ctrl+R on PC and Command+R on Mac).