Learn how to draw a great looking Parrot with easy drawing instructions and video tutorial.
By following the simple steps, you too can easily draw a perfect Parrot.
Step by Step Instructions for Drawing a Parrot
How to Draw a Great Looking Parrot for Kids and Beginners - Step 1

1. Begin by drawing a circle. This will form the parrot's head.
Drawing Step 2

2. Next, outline the parrot's body. First, extend a curved line downward from the head. Round the line - imagine it forming a complete circle if it were to continue. This forms the parrot's belly. Then, from the opposite side of the circle, extend a long, curved line. This outlines the parrot's back and tail. Finally, connect the lines using a third curved line, enclosing the parrot's tail.
Unlock AD FREE and PRINTABLE drawing and coloring tutorials
- 2,600+ drawing & coloring PDFs
- 50+ ebooks
- Ad-free website
Drawing Step 3

3. Erase the guide lines separating the parrot's head and body.
Drawing Step 4

4. Using a curved line, enclose a rounded shape on the front of the parrot's head. This will complete the shape of the head. Then, use two curved lines to enclose a large, upside down teardrop shape along the back of the bird's body. This outlines the wing.
Drawing Step 5

5. At the front of the head, use three short, curved lines to enclose a curved triangle overlapping the face. This is the parrot's beak. Enclose a half circle beneath the beak, using a short, curved line. This forms the beak's lower jaw.
Drawing Step 6

6. Draw several rows of wavy lines across the bird's wing, using connected, "U" shaped lines to form each layer. Do the same at the top of the tail. At the tip of the wing and tail, draw vertical curved lines, indicating flight feathers (learn how to draw a feather).
Drawing Step 7

7. Erase guide lines from the bird's face.
Add More Details to Your Parrot Picture - Step 8

8. Draw a set of bumpy, wavy, parallel lines across the front of the bird, passing near the base of the tail. This forms the tree branch on which the bird is perched. Then, draw a few small protrusions from the branch. Erase guide lines as necessary.
Complete the Outline of Your Parrot Drawing - Step 9

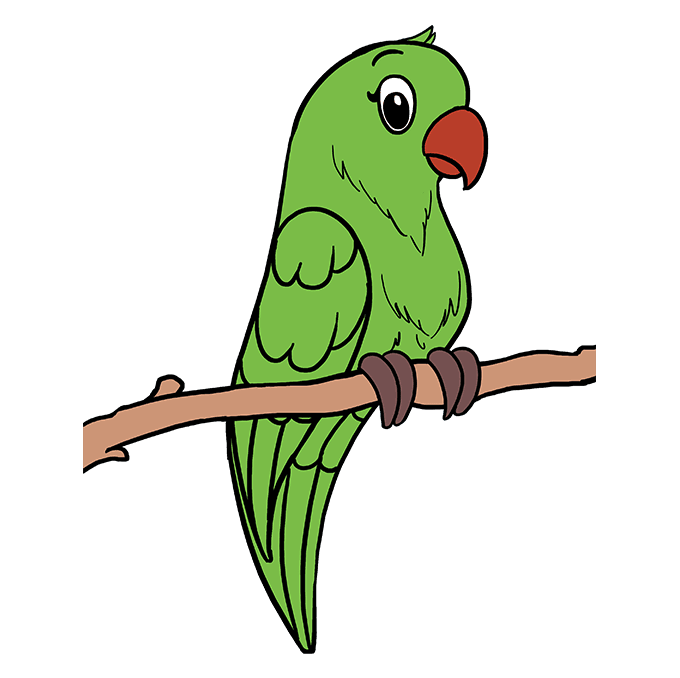
9. Add detail to your parrot. Enclose a few small triangles on top of the head to indicate a tuft of feathers. Draw an oval within an oval to form the eye. Draw a small circle within the smaller oval, and shade around it. Draw a thick, curved line at the corner of the eye to indicate eyelashes, and a curved line above to form the eyebrow. Use sets of curved lines, connected on each end at gentle points, to form the feet. Erase guide lines as necessary. Add feathery detail to the bird's chest using "V" shaped areas of short, curved lines.
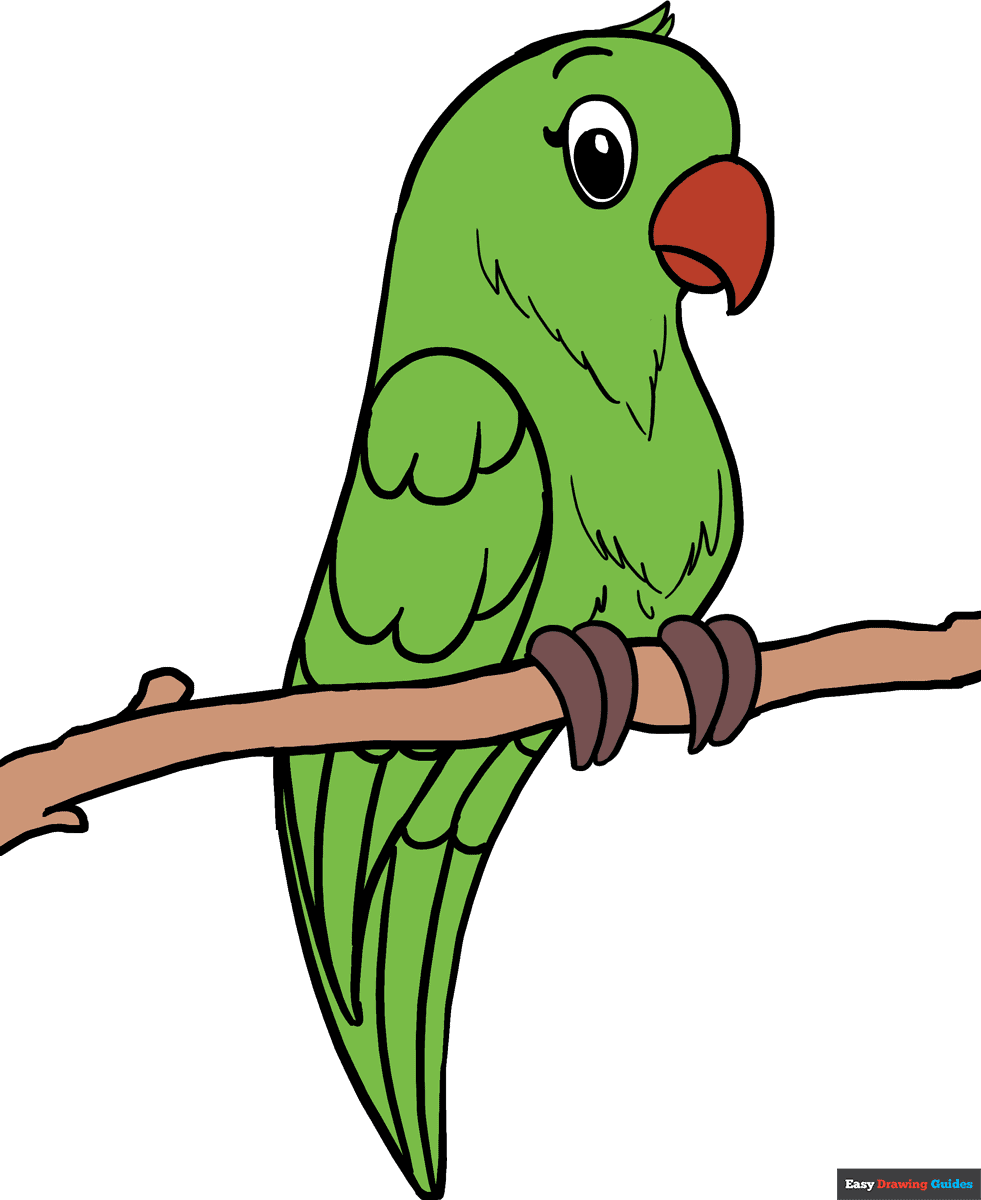
Color Your Parrot Drawing
10. Color your parrot. The bird in our example is green, but parrots come in many other colors as well - red, blue, yellow, grey, or combinations of colors.
Learn to draw more fine feathered friends with our bird drawing guides.
For more great Things to draw tutorials, see the 100 Easy Things to draw Tutorials post.
Watch 'How to Draw a Parrot' Video Tutorial

Learn More About The Parrot Drawing
Parrots are brightly colored, often noisy birds that live in tropical regions of South America, Africa, Asia, and Australia. About 360 different kinds of parrots have been described.
Parrots have long been important to people. They have been kept as pets since ancient times. For example, the Romans keeps parrots both as pets and as livestock.
One reason for the bird's popularity is its ability to imitate human sounds, seemingly learning to "talk." Parrots are also affectionate, capable of learning tricks, and long lived - some living 70 years or more.
Today, parrots are often used as symbols of classic pirates and of the earth's tropical regions. Parrots have also starred in their own feature films as well, such as the 2011 film Rio.
Scroll down for a downloadable PDF of this tutorial.
Would you like to draw a playful parrot? Doing so is easy with the help of this simple, step-by-step drawing tutorial.
All you will need is a pencil, an eraser, and a sheet of paper. You may also wish to color your finished drawing.
If you liked this drawing tutorial, see also the following guides: Cartoon Hawk drawing, Phoenix drawing, and Easter Chick drawing.
Parrot Drawing Tutorial - Easy & Fun Printable Pages
Join now and get immediate access to thousands of printable drawing instruction and practice pages!

Learn how to get access to thousands of printable pages!

MEMBER TROUBLESHOOTING
Still seeing ads or not being able to download the PDF?
First, check that you're logged in. You can log in on the member login page.
If you're still not able to download the PDF, the likely solution is to reload the page.
You can do this by clicking the browser reload button.
It is a circular arrow-shaped icon at the top of the browser window, typically found in the upper-left side (you can also use keyboard shortcuts: Ctrl+R on PC and Command+R on Mac).