Learn how to draw a great looking Parts of the Horse for Kids with easy drawing instructions and video tutorial.
By following the simple steps, you too can easily draw a perfect Parts of the Horse for Kids.
Step-by-Step Instructions for Drawing Parts of the Horse for Kids

How to Draw a Great Looking Parts of the Horse for Kids for Kids and Beginners - Step 1
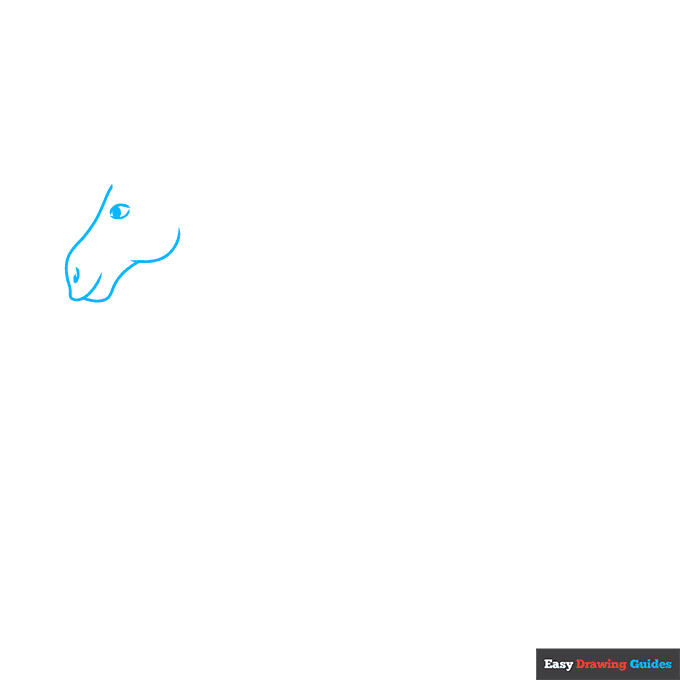
1. Begin the parts of the horse for kids outline by drawing the animal's head. Use a series of overlapping curved lines to trace the front of the face, lips, and jaw.
Use curved lines to enclose the almond-shaped eye and shade a circle inside it. Use another curved line for the nostril.
Drawing Step 2
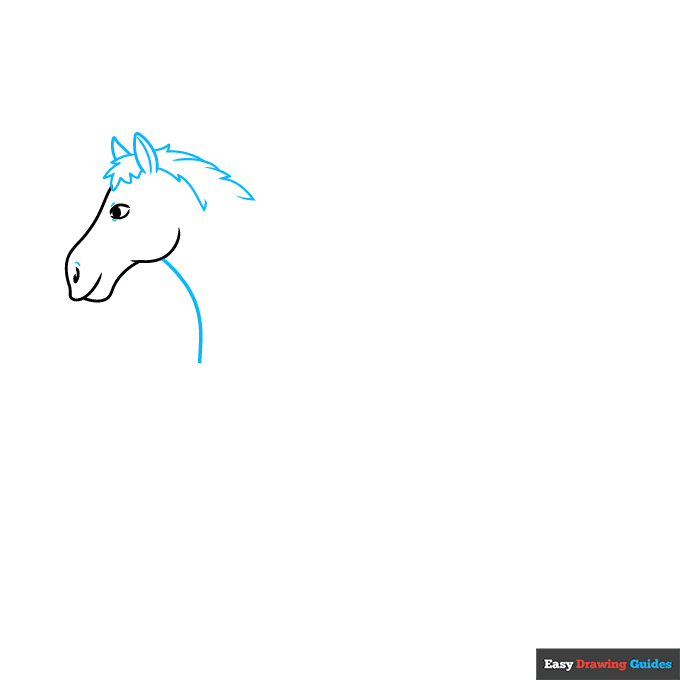
2. Contour the nose and eye with short lines. Then use a series of curved lines that meet at jagged points to draw the ears and mane. Use a long curved line for the front of the neck.
Unlock AD FREE and PRINTABLE drawing and coloring tutorials
- 1,900+ drawing & coloring PDFs
- 50+ ebooks
- Ad-free website
Drawing Step 3

3. Continue drawing the mane, using a series of curved lines that meet at jagged points. Continue the line of the neck and contour the chest with a curved line.
Drawing Step 4
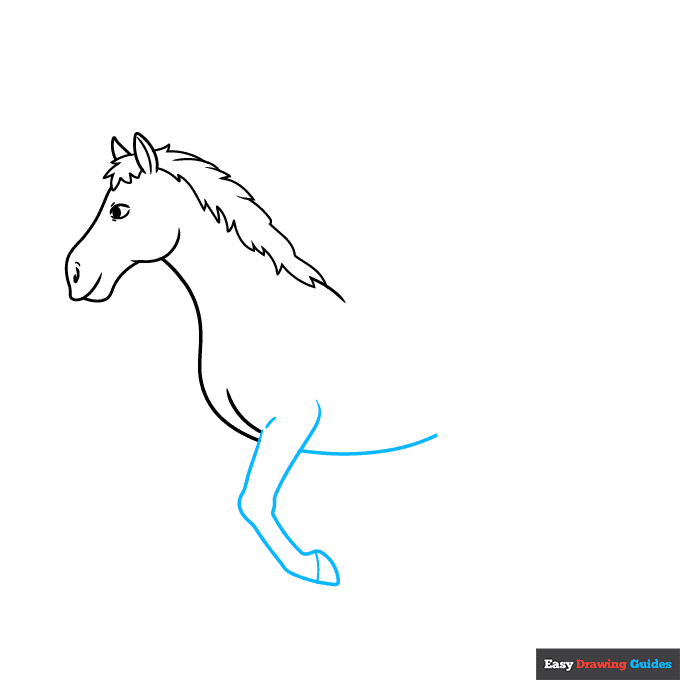
4. Use long curved lines to outline the leg and belly. Notice the bulges at the horse's joints. Band the bottom of the leg with a curved line to indicate the hoof.
Drawing Step 5
5. Use long curved lines to draw the remaining foreleg and band the bottom to form the hoof. Begin drawing the rear leg.
Drawing Step 6
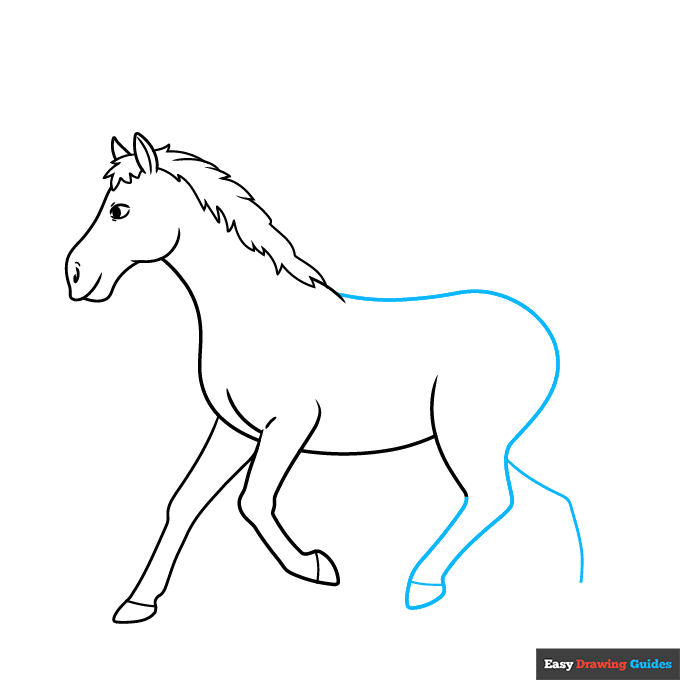
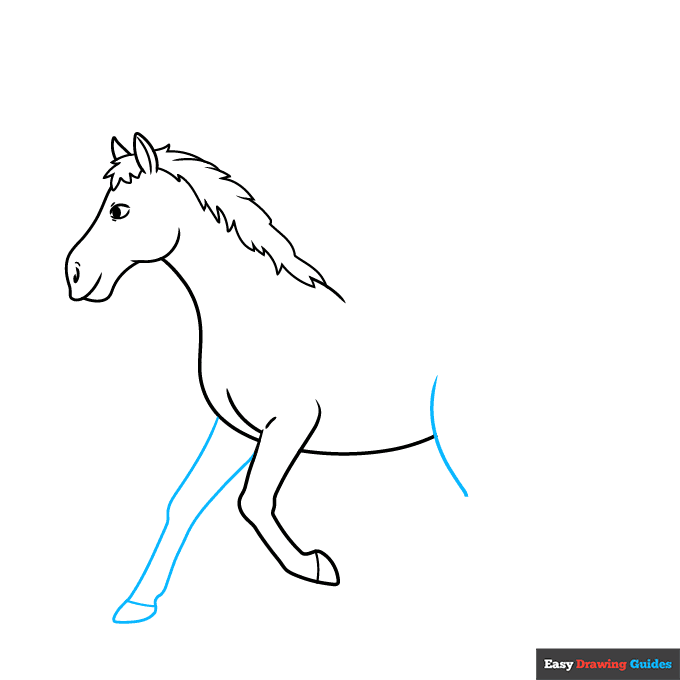
6. Extend a long curved line from the mane to form the horse's back, rump, and back of the leg, doubling it back on itself to complete the rear leg.
Band the bottom to indicate the hoof, then begin drawing the remaining rear leg.
Drawing Step 7
7. Use a long curved line to complete the rear leg. Band the bottom with a short line to indicate the hoof. Then use a series of curved lines that meet at points to enclose the tail.
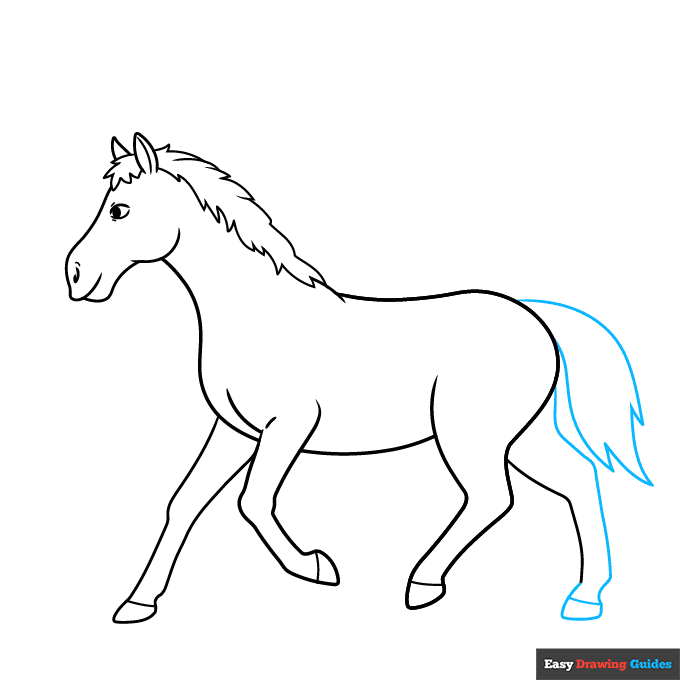
Add More Details to Your Parts of the Horse for Kids Picture - Step 8

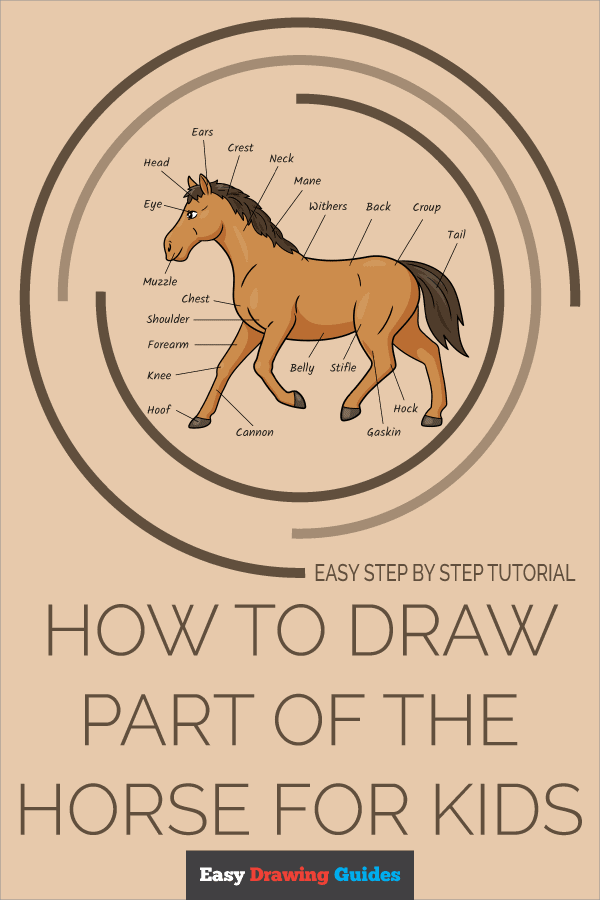
8. Use curved lines to texture the horse's mane and tail and to contour its body. Begin labeling its body parts.
Starting with the head and working clockwise, label the neck, back, tail, belly, hoof, shoulder, and muzzle. Draw straight lines from each word to the part it describes.
Complete the Outline of Your Parts of the Horse for Kids Drawing - Step 9
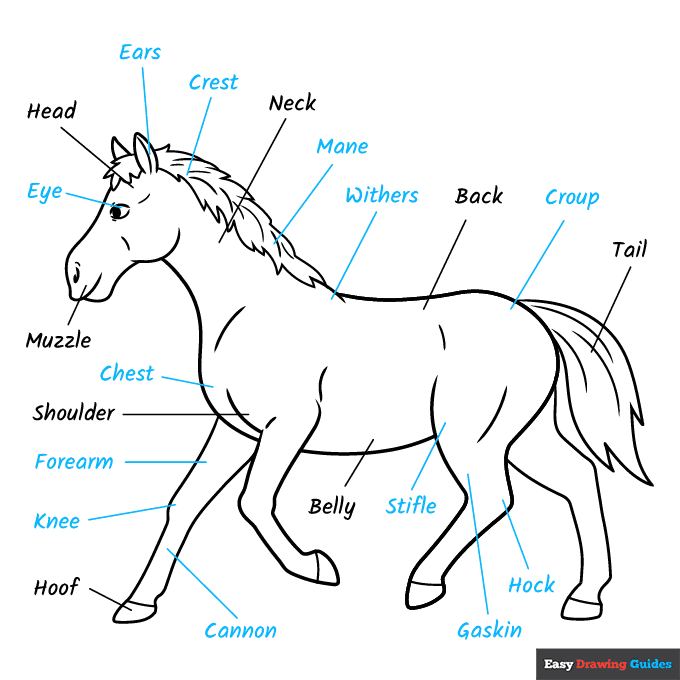
9. Continue labeling the eye, ears, crest, mane, withers, croup, hock, gaskin, stifle, cannon, knee, forearm, and chest. Draw straight lines to each.
Color Your Parts of the Horse for Kids Drawing
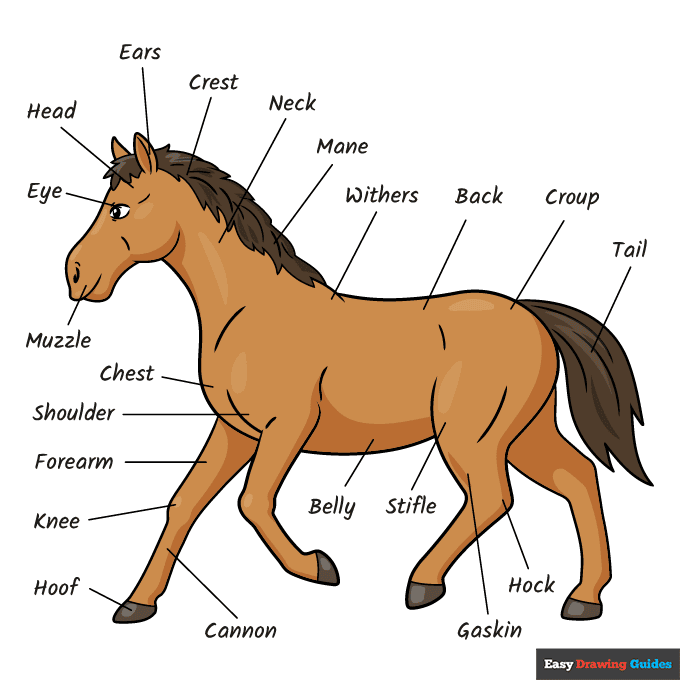
Your parts of a horse outline is now complete. Color your diagram.
Horses come in a range of colors, including black, brown, white, tan, grey, and reddish. Some are spotted. Others have markings on their legs or faces.
Watch 'How to Draw Parts of the Horse for Kids' Video Tutorial
Click HERE to save the tutorial to Pinterest!
Learn More About The Parts of the Horse for Kids Drawing
Do you love horses? If you want to learn all you can about them, this parts of the horse for kids drawing is a great place to start.
Many people love horses. Whether you want to be an artist, a vet, or a horseback rider, it's important to know the names of their body parts when you talk about them.
This horse is walking, but you can draw horses doing many things. Try your hand at this rearing horse drawing or this running horse drawing. You can even learn how to draw yourself riding a horse.
Horses are domestic animals, but they also have wild cousins. Can you label the parts of this zebra drawing or this donkey drawing?
Parts of the Horse for Kids Drawing Tutorial - Easy & Fun Printable Pages
Join now and get immediate access to thousands of printable drawing instruction and practice pages!
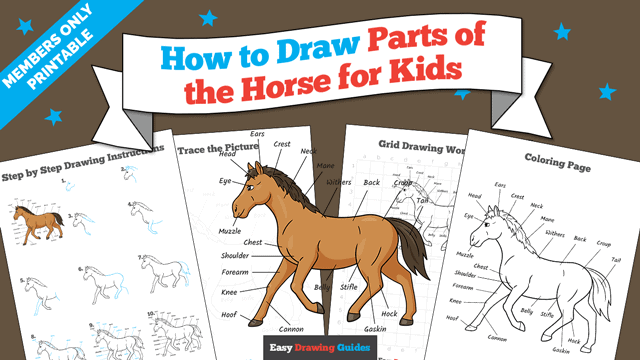
Learn how to get access to thousands of printable pages!

MEMBER TROUBLESHOOTING
Still seeing ads or not being able to download the PDF?
First, check that you're logged in. You can log in on the member login page.
If you're still not able to download the PDF, the likely solution is to reload the page.
You can do this by clicking the browser reload button.
It is a circular arrow-shaped icon at the top of the browser window, typically found in the upper-left side (you can also use keyboard shortcuts: Ctrl+R on PC and Command+R on Mac).